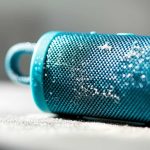
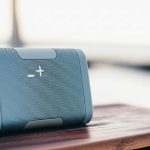
Don’t let sand and salt ruin your outdoor sound box! This guide offers a step-by-step process to thoroughly clean your device after a beach trip. Follow these simple tips to remove sand, salt residue, and grime, ensuring your sound box stays in top condition and delivers clear audio for your next adventure.
Ah, the beach! Sun, sand, surf, and your trusty outdoor sound box blasting your favorite tunes. It’s the perfect recipe for a great day. But once the sun sets and the towels are packed, a less glamorous task awaits: cleaning your beloved sound box. That salty air, that fine sand – they can work their way into every nook and cranny, potentially affecting performance. Don’t worry, though! Keeping your outdoor sound box in prime condition after a beach trip is totally doable, and it’s crucial for ensuring it keeps pumping out awesome audio for all your future adventures.
Taking your sound box to the beach is a fantastic way to enhance the experience. Whether you’re just relaxing on the sand or hosting a lively beach party, good sound makes everything better. However, the beach environment is notorious for being tough on electronics. Sand can be abrasive, salt water can be corrosive, and moisture is always a concern. That’s why a thorough cleaning after your beach excursion is not just a good idea, it’s a necessity if you want your sound box to last and perform its best.
This guide is here to walk you through the process step-by-step, making it simple and effective. We’ll cover everything from initial dust-off to the final polish, ensuring your outdoor sound box is ready for its next gig, be it by the campfire or in your backyard. Let’s get your sound box spick and span and ready to create more amazing memories!
## Pre-Cleaning Inspection: What to Look For
Before you grab any cleaning supplies, it’s wise to take a good look at your outdoor sound box. This initial inspection helps you understand the extent of the “damage” and tailor your cleaning approach. Think of it as a quick health check-up for your audio companion.
### Assessing the Sand Situation
Is there sand clinging to every surface? Can you see it packed into the speaker grilles? Did a rogue wave give it a direct hit, or did it just get sprinkled on? Knowing how much sand you’re dealing with will dictate your first cleaning steps. Sometimes it’s just a light dusting; other times, it looks like it’s been rolled in a sandbox.
### Identifying Salt Residue
The salty sea air is often invisible, but its effects are not. Look for any white, powdery residue on the speaker’s exterior, especially around buttons, ports, and seams. This salt residue can be corrosive over time if left unchecked. You might also notice a slight stickiness or a dulling of the finish.
### Checking for Moisture
Even if your sound box is advertised as waterproof or water-resistant, it’s always good to check if any moisture has seeped in. Look for condensation inside visible areas or check if any charging ports feel damp. If you have a truly waterproof model and it took a dunk, this step is even more crucial. For some, a quick rinse might be part of the cleaning process, but it’s vital to confirm your speaker’s capabilities first.
## The Dry Cleaning Phase: Banishing Loose Debris
The first and most important step in cleaning your outdoor sound box after a beach trip is to tackle the dry debris. Moisture and sand mixed together can create a gritty paste that’s much harder to remove and can even scratch surfaces. So, let’s get that sand off first, gently but effectively.
### Brushing Away the Grains
For general sand removal, a soft-bristled brush is your best friend. A clean paintbrush, a soft makeup brush, or even a dedicated detailing brush works wonders. Gently brush away sand from the speaker grille, the casing, and any crevices. Work from top to bottom so the sand falls away from the device. Be thorough but gentle; you don’t want to scrub hard enough to scratch the finish.
### The Power of Compressed Air
Compressed air is fantastic for dislodging stubborn sand particles that brushes can’t reach. Hold the can upright and use short bursts. Aim it at speaker grilles, around buttons, and into any seams or openings. This can help blow out sand that’s lodged deep within the speaker components. Be careful not to blast too forcefully, especially near sensitive areas like charging ports. It’s also a good idea to do this outdoors or in a well-ventilated area, as sand can fly everywhere!
### Wiping Down with a Dry Microfiber Cloth
After brushing and using compressed air, give the entire exterior a good wipe-down with a clean, dry microfiber cloth. This will pick up any remaining loose dust and fine sand particles. Microfiber is ideal because it’s non-abrasive and excellent at trapping fine particles without scratching.
## Tackling Salt and Grime: Damp Cleaning Techniques
Once you’ve removed as much dry debris as possible, it’s time to address any salt residue, smudges, or general grime. This is where a little bit of moisture comes in, but always remember to be conservative and check your speaker’s water resistance rating. If your outdoor sound box is not specifically waterproof, you’ll need to be extra cautious.
### Choosing the Right Cleaning Solution
For most outdoor sound boxes, a simple solution of mild soap (like dish soap) and water is sufficient. Mix a few drops of mild soap in a bowl of lukewarm water. Avoid harsh chemicals, abrasive cleaners, or alcohol-based products, as these can damage the speaker’s finish or internal components. For very stubborn spots, a slightly diluted vinegar solution (1 part vinegar to 3 parts water) can sometimes be effective for salt residue, but always test it on an inconspicuous area first.
### The Damp Cloth Method
Dampen a clean microfiber cloth with your chosen cleaning solution. Wring it out thoroughly so it’s barely damp, not wet. You don’t want any dripping water. Gently wipe down the entire exterior of the sound box, paying special attention to areas with visible salt residue. For speaker grilles, you can use a cotton swab lightly dampened with the solution to clean between the openings, being careful not to push moisture inside.
### Cleaning Ports and Buttons
Charging ports, aux inputs, and any physical buttons are prime spots for sand and salt buildup. Use a dry cotton swab or a toothpick very gently to dislodge any visible debris in these areas *before* using a damp swab. If you need to clean them, use a cotton swab *very lightly* dampened with your cleaning solution, and ensure it’s not dripping. Immediately follow up with a dry swab to absorb any residual moisture. It’s crucial not to let water get into these openings.
## Special Considerations for Waterproof Speakers
If you own a waterproof outdoor sound box, you have a bit more leeway, but “waterproof” doesn’t always mean “indestructible” or “resistant to everything.” It’s still important to clean them properly to maintain their integrity and performance. Many of the steps for dry cleaning remain the same, but the damp cleaning phase can be approached a bit differently.
### Rinsing Under Fresh Water (If Recommended)
Some waterproof speakers can be rinsed under a gentle stream of fresh tap water. **Always consult your manufacturer’s manual first.** If it’s safe to do so, a gentle rinse can be an excellent way to wash away salt and sand. Make sure the water pressure is low and the temperature is cool. Avoid using high-pressure jets or hot water. If you’re unsure, it’s always safer to stick with the damp cloth method. Remember, even waterproof speakers have limitations, and submersion in saltwater for extended periods can still be detrimental.
### Drying a Waterproof Speaker
After any rinsing or damp cleaning, thorough drying is paramount. Use a soft, dry microfiber cloth to wipe down the entire exterior. Pay close attention to speaker grilles, seams, and any ports. Leave the sound box to air dry completely in a well-ventilated area for at least 24 hours, or even longer, before attempting to charge it or turn it on. This ensures any trapped moisture has evaporated, preventing internal damage. You might even find articles on how to clean waterproof Bluetooth speaker after pool use that offer additional insights applicable here.
### Keeping Ports Clean
Even with a waterproof speaker, it’s essential to ensure charging ports are free of debris and completely dry. Salt or sand in a charging port can prevent charging or, worse, cause corrosion. After rinsing or damp cleaning, use a dry cotton swab to gently clean the port and ensure no moisture remains. For devices with detachable waterproof covers for ports, ensure these are also cleaned and dried thoroughly before reattaching.
## Drying and Final Touches: Ensuring Longevity
The final steps of cleaning your outdoor sound box after a beach trip are all about ensuring it’s completely dry and ready for its next use. Proper drying is absolutely critical to prevent internal damage and maintain the speaker’s audio quality.
### Air Drying Patience
The most crucial part of drying is patience. After cleaning, allow your outdoor sound box to air dry completely in a warm, dry, well-ventilated space. Avoid direct sunlight or excessive heat, as this can damage the plastic or internal components. You might need to leave it to dry for 24-48 hours, depending on how damp it got and the ambient humidity. Don’t rush this process! If your speaker has any fabric elements, ensure they are also thoroughly dried to prevent mildew.
### The Importance of a Thorough Dry
Even if your speaker seems dry on the outside, moisture can linger in hidden crevices or within the speaker cones. Ensure all ports are dry. If you used compressed air during the sand removal phase, you can also use it gently now to help push out any trapped moisture from port openings or seams, but be very careful not to push moisture further in.
### Checking Speaker Grilles for Obstructions
Once dry, take one last look at the speaker grilles. Sometimes, a bit of debris can get lodged in there, impacting sound quality. If you notice anything, try to gently dislodge it with a toothpick or compressed air. A clear grille is essential for good sound projection. Maintaining the clarity of your speaker’s output is a key part of keeping your sound box performing optimally. For example, if you’re noticing issues with the audio, reading up on how to repair Bluetooth speaker no sound might be helpful down the line, but proper cleaning now is the best preventative measure.
### Post-Cleaning Test Run
Once you’re absolutely certain your sound box is dry, it’s time for a test run. Connect it to your device, play some music at a moderate volume, and listen carefully. Check for any unusual crackling, distortion, or muted sounds. If everything sounds clear and robust, congratulations – you’ve successfully cleaned your outdoor sound box! If you do notice issues, it might be time to troubleshoot further or consult the manual. Ensuring your speaker is ready for use, much like ensuring it’s properly connected for beach use, is key. You might find resources on how to connect Bluetooth speaker to phone at beach useful for setting up your next beach outing.
## Maintaining Your Sound Box for Future Adventures
Cleaning your outdoor sound box after a beach trip isn’t just a one-off chore; it’s part of a maintenance routine that keeps your device in top shape. By incorporating these practices, you’ll extend its lifespan and ensure it always delivers the best possible audio experience.
### Store Properly
When not in use, store your sound box in a cool, dry place, away from extreme temperatures and humidity. If possible, use its original packaging or a protective case to shield it from dust and accidental bumps. This simple step can prevent a lot of potential wear and tear.
### Protect it from the Elements
Even when not at the beach, consider how you use your outdoor sound box. If you’re often using it in dusty or humid environments, regular light cleaning will be beneficial. For instances where you want to amplify your audio experience, learning how to improve sound quality for outdoor party can also be useful, and a clean speaker is the first step to good sound.
### Firmware Updates
Many modern Bluetooth speakers receive firmware updates that can improve performance, battery life, or connectivity. Check the manufacturer’s app or website periodically to see if any updates are available and install them as recommended. This is another easy way to keep your device optimized.
### Invest in Protection
Consider investing in a dedicated speaker cover or a waterproof carrying case, especially if you’re a frequent beachgoer or outdoor enthusiast. These accessories can provide an extra layer of defense against sand, water, and physical damage. For those looking to maximize their audio setup, exploring options like how to pair Bluetooth speakers for amazing outdoor stereo sound can be a great next step, and a well-maintained speaker is crucial for any multi-speaker setup.
### Know Your Speaker’s Limitations
Always be aware of your sound box’s specifications, especially its IP rating (Ingress Protection). This tells you how well it’s protected against dust and water. Don’t push your speaker beyond its intended capabilities, as this can lead to costly repairs or replacements. Understanding your device thoroughly will help you avoid issues, just like knowing how to choose a Bluetooth speaker for beach use helps you select the right gear in the first place.
In conclusion, cleaning your outdoor sound box after a beach trip is a straightforward process that pays dividends in the long run. By following these simple guidelines, you can ensure your speaker remains a reliable source of entertainment for countless beach days and outdoor gatherings to come. Happy listening!
Key Takeaways
- Gentle Cleaning is Key: Always use soft cloths and mild cleaning solutions to avoid damaging your sound box’s delicate components.
- Sand Removal First: Dry brushing or compressed air is crucial for removing loose sand before introducing any moisture.
- Saltwater Caution: Salt residue can be corrosive. Thoroughly wipe down the exterior with a damp cloth and dry it completely.
- Port and Grille Care: Pay extra attention to speaker grilles and charging ports, as these areas can trap debris.
- Waterproofing Matters: If your sound box is waterproof, a gentle rinse might be an option, but always check the manufacturer’s instructions.
- Drying is Essential: Ensure the sound box is completely dry before plugging it in or turning it on to prevent internal damage.
- Regular Maintenance: Cleaning your outdoor sound box after each beach trip will significantly extend its lifespan and maintain sound quality.
Frequently Asked Questions
How often should I clean my outdoor sound box after beach trips?
It’s best to clean your outdoor sound box after every beach trip. This prevents sand and salt from accumulating and potentially causing damage or affecting sound quality over time.
Can I use a regular household cleaner on my outdoor sound box?
No, it’s not recommended. Stick to mild soap and water or a very diluted vinegar solution for salt residue. Harsh chemicals can damage the speaker’s finish and internal components.
What should I do if sand gets into the speaker grille?
Use a soft brush or compressed air to gently dislodge the sand. If some remains, try a dry cotton swab very carefully. Avoid pushing the sand further into the speaker.
Is it okay to rinse my sound box under the tap if it’s advertised as waterproof?
Always check your manufacturer’s manual first. If it explicitly states it’s safe to rinse under fresh water, do so gently with low pressure. If in doubt, stick to a damp cloth cleaning method.
How long should I let my sound box air dry?
Allow at least 24 to 48 hours for complete air drying in a warm, dry, well-ventilated area. It’s better to be safe and ensure no residual moisture remains before powering it on or charging.
What if my sound box still sounds muffled after cleaning?
Ensure the speaker grilles are completely clear of debris. If the issue persists, there might be internal damage or a more significant technical problem that requires professional attention or further troubleshooting.