To force your Wi-Fi to use the 2.4 GHz band, you need to access your router’s settings and select the appropriate frequency band manually. Most modern routers allow you to choose between 2.4 GHz and 5 GHz frequencies through their admin interface, ensuring you connect to the band best suited for your needs. Configuring this setting can improve connectivity for devices that perform better on 2.4 GHz, especially if you’re experiencing interference or slower speeds on the 5 GHz band.
In a nutshell, to ensure your device connects exclusively to the 2.4 GHz Wi-Fi, access your router’s admin panel, locate the wireless settings, and select or prioritize the 2.4 GHz band. Alternatively, you can change your device’s network preferences to connect to the 2.4 GHz network only, giving you more control over your connection.
Getting your devices to stick to the 2.4 GHz Wi-Fi can be a game-changer if you’re struggling with signal strength or congestion on the 5 GHz band. Whether you’re troubleshooting connectivity issues or trying to extend your Wi-Fi coverage, forcing your device to use 2.4 GHz can help stabilize your connection. The process is straightforward: use your router’s settings to disable the 5 GHz band temporarily or create a dedicated network for 2.4 GHz, then reconnect your devices. By doing so, you’ll enjoy a more reliable connection, especially in areas with lots of wireless interference or for older devices that don’t support 5 GHz.

How to force Wi-Fi to use 2.4 GHz?
Understanding Wi-Fi Frequency Bands
Wi-Fi networks operate mainly on two frequency bands: 2.4 GHz and 5 GHz. The 2.4 GHz band is older but offers wider coverage, making it ideal for large spaces. The 5 GHz band provides faster speeds but has less range and penetrates obstacles less effectively.
Why You Might Want to Use Only 2.4 GHz
Some devices, like certain smart home gadgets or older gadgets, work better on 2.4 GHz. Additionally, if your Wi-Fi connection drops frequently, forcing it to stay on 2.4 GHz can be helpful. This approach also reduces interference from other 5 GHz networks in crowded areas.
Check Your Router’s Dual-Band Capabilities
Most modern routers support both 2.4 GHz and 5 GHz frequencies. Before proceeding, verify your router’s specifications. Look for terms like “dual-band” in the model details or check the label on your device.
Accessing Router Settings
To start, connect to your Wi-Fi network and open a web browser. Enter your router’s IP address into the address bar, usually something like 192.168.0.1 or 192.168.1.1. Log in with the username and password provided by your router manufacturer or your internet provider.
Locating Wireless Settings
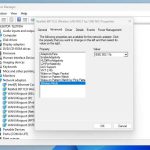
Once inside the router interface, navigate to the wireless or Wi-Fi settings section. Different routers have different menus, but look for options labeled “Wireless,” “Wi-Fi,” or “Network.”
Forcing Wi-Fi to Use 2.4 GHz on Your Router
Most routers allow you to control the band settings directly. You can disable the 5 GHz band or configure the 2.4 GHz band to be the only active frequency.
Disabling 5 GHz Band
Find the setting for the 5 GHz band and turn it off or disable it. This action forces all devices to connect only through the 2.4 GHz band. Remember, disabling 5 GHz might reduce overall Wi-Fi speeds but can improve stability for certain devices.
Setting the 2.4 GHz Band as the Primary
If your router supports it, set the 2.4 GHz band as the default or primary network. Change the network name (SSID) of the 2.4 GHz band to make sure your devices connect to the preferred network.
Using Band Steering and Network Management Features
Some routers have a feature called band steering, which automatically directs devices to the best band. Disable band steering if you want manual control over device connections.
Manual Selection via Device Settings
Alternatively, you can manually connect each device to the 2.4 GHz network. Go into the device’s Wi-Fi settings, select the correct SSID, and enter the password.
Implementing Static IP Addressing
To prevent devices from switching bands unexpectedly, assign static IP addresses to them. This method keeps your device connected on the desired network without interference from automatic network selection.
Steps for Static IP Setup
Access each device’s Wi-Fi settings and choose to assign a static IP address within the network’s IP range. This confirms your device always connects to your 2.4 GHz network.
Advanced Router Settings for Better Control
For tech-savvy users, advanced options like Wi-Fi channel selection can help optimize the 2.4 GHz experience. Choose a less crowded channel to avoid interference with neighboring networks.
Changing Wi-Fi Channels
Experiment with different channels, such as 1, 6, or 11, to find the clearest frequency. This improves connection quality and reduces lag.
Additional Tips for Reliable 2.4 GHz Connection
Placement of your router significantly impacts 2.4 GHz performance. Keep it in central locations, away from thick walls or metal objects. Updating firmware and maintaining your router also helps keep your network stable.
Updating Firmware
Visit your router manufacturer’s website regularly to download the latest firmware updates. These updates can fix bugs and improve performance.
Optimizing Router Placement
Position your router in an open space, elevated, and free from obstructions. This maximizes coverage for your 2.4 GHz network.
Troubleshooting Common Issues
If your devices still prefer 5 GHz or have trouble connecting to 2.4 GHz, reset your router. Reconfigure the settings and try reconnecting devices step-by-step.
Resetting Router Settings
Use the reset button on your router to restore default settings. Then, apply the preferred configurations again, focusing on the 2.4 GHz band.
Checking Device Compatibility
Ensure your devices support 2.4 GHz connectivity. Some newer devices default to 5 GHz, so manual network selection may be necessary.
Forcing your Wi-Fi to use 2.4 GHz involves adjusting your router’s settings to disable or prioritize this band. Whether you choose to disable the 5 GHz connection, manually connect devices, or optimize channels, these steps help improve stability and range for devices that benefit from 2.4 GHz. Regularly reviewing your network setup and making adjustments ensures a reliable and consistent Wi-Fi experience on this frequency.
How to Set Up a Smart Home Device on a 2.4 GHz Network
Frequently Asked Questions
How can I prioritize the 2.4 GHz band on my router?
To prioritize the 2.4 GHz band, access your router’s settings and locate the wireless or Wi-Fi section. Look for options related to band steering or device priority. Set the 2.4 GHz network as the preferred connection or disable the 5 GHz band temporarily to ensure devices connect solely through 2.4 GHz. Saving these settings helps your devices connect to the desired frequency automatically.
What steps should I take to manually connect my device to 2.4 GHz Wi-Fi?
Open your device’s Wi-Fi settings and scan for available networks. Select the network name (SSID) associated with your 2.4 GHz band. If your network has separate SSIDs for 2.4 GHz and 5 GHz, choose the one labeled for 2.4 GHz. Enter the password if prompted, and connect. This manual selection ensures your device uses the 2.4 GHz connection exclusively.
Is there a way to disable the 5 GHz band without affecting my 2.4 GHz network?
Yes, you can disable the 5 GHz band through your router’s admin panel. Log in to your router, navigate to the wireless settings, and toggle off or disable the 5 GHz frequency. Keep the 2.4 GHz network enabled. This prevents devices from connecting to 5 GHz, forcing them to connect only via the 2.4 GHz band.
Can I change the network name to differentiate the 2.4 GHz and 5 GHz bands?
Absolutely. You can assign unique SSIDs to each band in the router’s wireless settings. For example, name the 2.4 GHz network “HomeWiFi-2.4” and the 5 GHz network “HomeWiFi-5.” This makes it easier to manually select and connect to the preferred frequency on your devices, ensuring consistent use of the 2.4 GHz band.
How does firmware update influence Wi-Fi band settings?
Updating your router’s firmware can improve its functionality and provide better control over band management. Some updates include options for more precise band steering or improved manual settings. Check your router manufacturer’s website for firmware updates and follow the instructions to install them, which may help in configuring the device to favor the 2.4 GHz band.
Final Thoughts
To force Wi-Fi to use 2.4 GHz, start by accessing your router settings through a web browser. Find the wireless or Wi-Fi section, then look for band settings. Select 2.4 GHz or set the preferred band to 2.4 GHz only. Save the changes and restart your device if needed.
Adjusting your device’s network settings can also help prioritize the 2.4 GHz band. Turn off the 5 GHz band on your device, forcing it to connect exclusively to 2.4 GHz networks.
How to force Wi-Fi to use 2.4 GHz? By configuring your router and device settings to prioritize this band, you ensure a more stable connection in certain environments.