Ready to elevate your home theater audio? Connecting a subwoofer to your sound box is simpler than you might think and adds incredible depth to your movies and music. This guide walks you through the essential steps, from identifying the right ports to making secure connections. You’ll be enjoying powerful bass in no time!
So, you’ve got a home theater system, and you’re craving that deep, rumbling bass that really makes movies come alive and music feel powerful. You’ve got the main speakers, the crisp highs, and the clear mids, but something’s missing, right? That “oomph” that you feel as much as you hear. That, my friend, is the magic of a subwoofer. Connecting a subwoofer to your home theater sound box is one of the most impactful upgrades you can make to your audio setup. It takes your viewing and listening experience from good to absolutely phenomenal.
Don’t let the idea of connecting another piece of equipment intimidate you. It’s often much more straightforward than you might think. We’re going to break it down step-by-step, covering everything from what cables to use to where to plug them in. By the end of this, you’ll be well on your way to enjoying that rich, resonant bass that makes your favorite content truly immersive. Whether you’re a seasoned audiophile or just getting started with home theater, this guide is designed to be clear, simple, and helpful.
Let’s dive in and get that subwoofer hooked up!
- Identify Your Ports: Know the difference between subwoofer pre-out, LFE, and line-out ports on your receiver and subwoofer.
- Wired Connections are Standard: Most subwoofers connect via an RCA cable, but some modern systems offer wireless options.
- Receiver Output Matters: Ensure your receiver has a dedicated subwoofer or LFE output for the best signal.
- Subwoofer Input Types: Understand single LFE inputs versus stereo line-in ports on your subwoofer.
- Cable Quality is Key: Invest in a decent RCA subwoofer cable for optimal signal transfer and minimal interference.
- Power and Placement: Remember to connect power to your subwoofer and position it for the best bass response.
- Test and Adjust: After connecting, run a test to confirm sound and adjust volume and crossover settings for your room.
📑 Table of Contents
- Understanding Your Home Theater Setup
- Locating the Right Ports for Connection
- Wired Connections: The Standard Method
- Wireless Subwoofer Connections: Convenience and Simplicity
- Powering On and Initial Setup
- Testing and Fine-Tuning Your Subwoofer
- Troubleshooting Common Issues
- Conclusion: Enjoy Your Enhanced Audio!
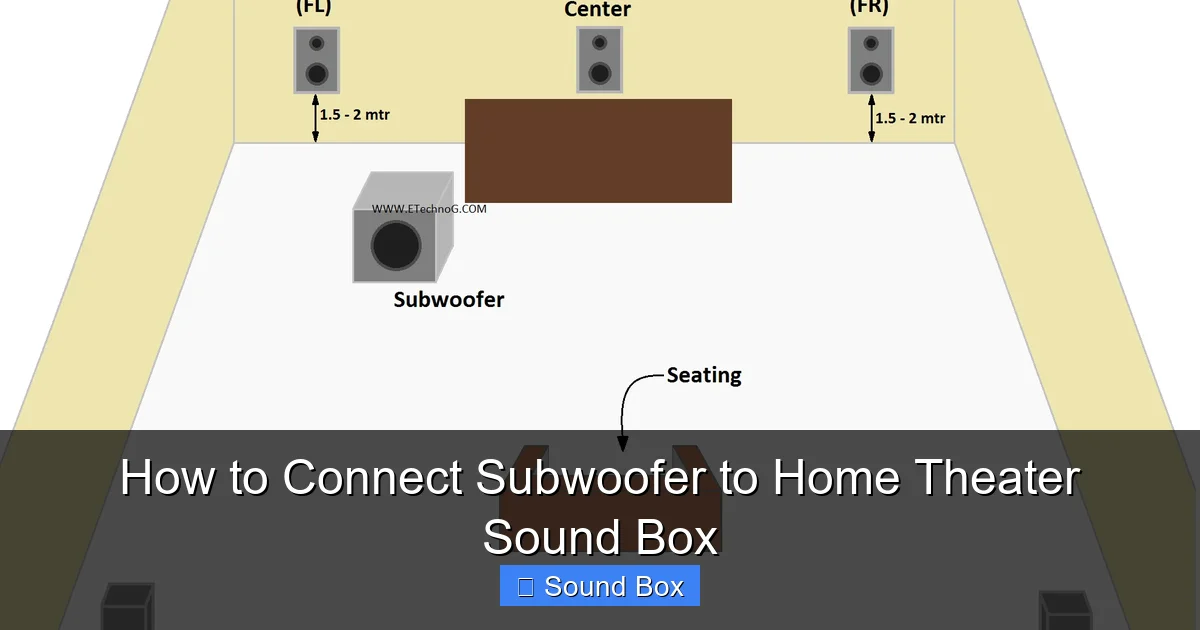
Understanding Your Home Theater Setup
Before we grab any cables, it’s crucial to understand what you’re working with. Your home theater system is made up of several components, and knowing their roles will make the connection process much smoother. The heart of your system is usually an AV receiver (or soundbar with subwoofer out), which takes all your audio and video sources and distributes them to the appropriate speakers. The subwoofer is specifically designed to reproduce the low-frequency sounds, often called “bass” or “LFE” (Low-Frequency Effects).
The AV Receiver: The Brains of the Operation
Your AV receiver is the command center for your home theater. It’s where all your devices (Blu-ray player, streaming box, game console) connect. Crucially, it’s also where the audio signal destined for the subwoofer originates. You’ll need to locate a specific port on the back of your receiver for this.
The Subwoofer: The Bass Producer
The subwoofer is the specialist. Its sole job is to handle those deep, powerful notes. It has its own amplifier built-in and needs to be connected to a power source as well as your receiver.
The Connections: Ports and Cables
The type of connection you use will depend on the ports available on both your receiver and your subwoofer. The most common type of connection is wired, using an RCA cable. However, some newer systems might offer wireless capabilities, which we’ll touch on later.
Locating the Right Ports for Connection
Visual guide about How to Connect Subwoofer to Home Theater Sound Box
Image source: i2.wp.com
This is where the rubber meets the road, or rather, where the cable meets the port. Finding the correct outputs on your receiver and inputs on your subwoofer is the first critical step in how to connect a subwoofer to your home theater sound box. Don’t worry if the labels seem a bit technical; we’ll demystify them.
On Your AV Receiver (or Soundbar)
Look on the back panel of your AV receiver. You’re searching for one of these labels:
- SUBWOOFER PRE-OUT: This is the most common and ideal port. It’s specifically designed to send a dedicated low-frequency signal to the subwoofer.
- LFE (Low-Frequency Effects) OUT: This port serves the same purpose as a SUBWOOFER PRE-OUT. LFE is the technical term for the channel in surround sound formats that contains the deepest bass information.
- LINE OUT (or AUDIO OUT): In some simpler systems or older receivers, you might not find a dedicated subwoofer port. In such cases, you might be able to use a stereo LINE OUT pair (Left and Right). However, this isn’t ideal as it sends a full-range signal, and your subwoofer will need to filter out the higher frequencies. Always prioritize a dedicated SUBWOOFER or LFE out if available.
If you’re using a soundbar, check its rear panel or manual for a “Subwoofer Out” or “Wireless Subwoofer Pairing” button. Some soundbars come with a wireless subwoofer, which simplifies this part significantly.
On Your Subwoofer
Now, let’s look at your subwoofer. The connection points will typically be on the back panel.
- LFE IN (or SUB IN): This is the preferred input on your subwoofer. It’s designed to accept the dedicated LFE signal directly from your receiver.
- LINE IN (or STEREO IN / L/R IN): If your receiver doesn’t have an LFE or Subwoofer out, you’ll use this stereo input. You’ll need to connect the left and right RCA outputs from your receiver to the left and right inputs on your subwoofer. Your subwoofer has internal circuitry to manage the crossover and filter the audio.
- WIRELESS SYNC / PAIRING BUTTON: If your subwoofer is designed to be wireless, you’ll look for buttons related to pairing or syncing with a compatible transmitter or receiver.
Wired Connections: The Standard Method
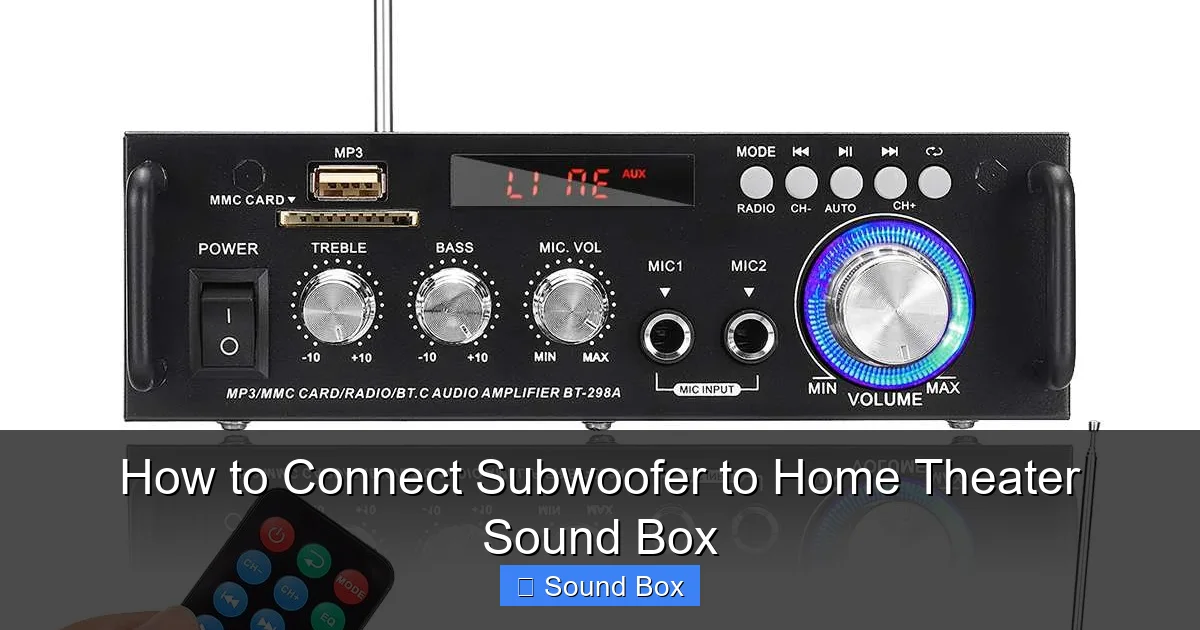
Visual guide about How to Connect Subwoofer to Home Theater Sound Box
Image source: images.nexusapp.co
For most home theater enthusiasts, a wired connection is the go-to method. It’s reliable, generally offers the best signal quality, and is usually the most budget-friendly. The key component here is the RCA cable.
Choosing the Right Cable
You’ll need a subwoofer cable, which is essentially a specialized RCA cable. While a standard RCA cable might work in a pinch, a dedicated subwoofer cable is shielded to prevent interference and is built to handle the specific frequencies involved. This ensures a cleaner, more powerful bass signal. Look for cables specifically labeled as “subwoofer cable” or “LFE cable.”
Connecting the Receiver to the Subwoofer
Here’s how to make the actual connection:
- Power Down: Always ensure both your AV receiver and your subwoofer are powered off and unplugged from the wall outlet before making any connections. This prevents potential damage from electrical surges.
- The Receiver Output: Take one end of your RCA subwoofer cable and plug it into the SUBWOOFER PRE-OUT or LFE OUT port on your AV receiver.
- The Subwoofer Input: Take the other end of the RCA subwoofer cable and plug it into the LFE IN or SUB IN port on your subwoofer.
- If Using Stereo L/R Outputs: If you are using the stereo LINE OUT ports on your receiver, you will need a standard stereo RCA cable (often a single cable with two RCA plugs on each end, one red and one white). Connect the red plug to the right (R) output on your receiver and the white plug to the left (L) output. Then, connect the corresponding red and white plugs to the R and L LINE IN ports on your subwoofer.
Wireless Subwoofer Connections: Convenience and Simplicity
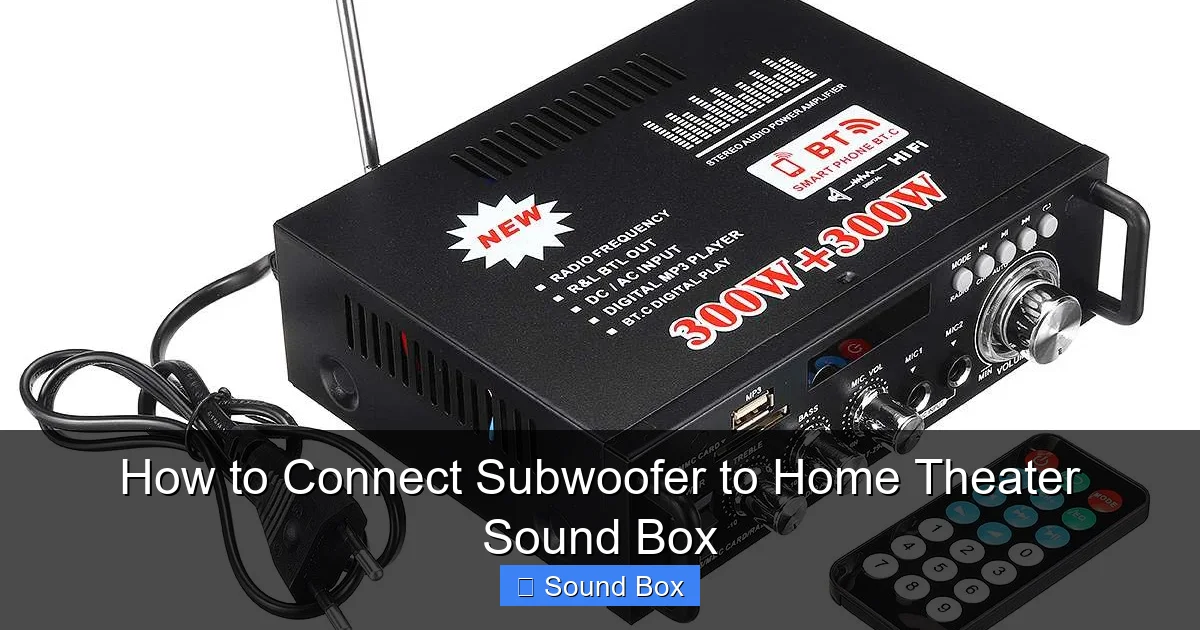
Visual guide about How to Connect Subwoofer to Home Theater Sound Box
Image source: images.nexusapp.co
Wireless subwoofers offer a fantastic solution for tidying up your living space and avoiding unsightly cables. The setup process is usually straightforward and often involves a pairing procedure.
How Wireless Works
Typically, a wireless subwoofer system consists of the subwoofer itself and a transmitter/receiver unit. The transmitter connects to your AV receiver’s subwoofer pre-out, and the receiver (built into the subwoofer) picks up the signal wirelessly. Many modern receivers and subwoofers have integrated wireless technology, meaning you don’t need separate boxes.
The Pairing Process
The exact steps can vary between brands, so always consult your subwoofer’s manual. However, the general process involves:
- Connect Power: Plug in both your receiver and your wireless subwoofer.
- Put Subwoofer in Pairing Mode: Most wireless subwoofers have a dedicated button or a sequence to put them into pairing mode. This is often indicated by a blinking light.
- Initiate Pairing on Receiver/Transmitter: If your system uses a separate transmitter, you might need to press a button on that. If the wireless capability is built into your receiver, you might need to navigate through a setup menu on your receiver to initiate pairing.
- Wait for Connection: The subwoofer and receiver will search for each other. Once connected, an indicator light on the subwoofer (and possibly the receiver) will usually turn solid, confirming the link.
Wireless connections are incredibly convenient, but it’s worth noting that in rare cases, they can be susceptible to interference from other wireless devices. However, most modern systems are quite robust. If you’re looking to connect a subwoofer to a Bluetooth speaker, that’s a slightly different setup, often requiring a specific transmitter or a subwoofer designed for such a purpose, and you can learn more about how to connect a subwoofer to a Bluetooth speaker in our dedicated guide.
Powering On and Initial Setup
Once your cables are connected (or your wireless link is established), it’s time to bring your system to life and configure it for optimal sound.
Connecting Power
This is a simple but crucial step. Your subwoofer has its own internal amplifier, so it needs its own power connection. Plug the subwoofer’s power cord into a wall outlet or a surge protector.
Turning Everything On
The order in which you power on your components can sometimes matter. A common and safe practice is:
- Turn on your AV receiver first.
- Then, turn on your subwoofer.
- Finally, power up your other source devices (TV, Blu-ray player, etc.).
Receiver Setup Menu
This is where you tell your receiver that you have a subwoofer connected and how to handle it.
- Speaker Configuration: Navigate to your receiver’s setup menu (usually accessible via a “Setup” or “Menu” button on your remote). Go to the speaker setup or configuration section.
- Assign Subwoofer: Ensure that the subwoofer channel is set to “Yes” or “Enabled.” Your receiver needs to know to send signals to it.
- Crossover Frequency: This is a critical setting. The crossover determines the point at which the receiver stops sending bass frequencies to your main speakers and sends them to the subwoofer. For most systems, setting this to around 80Hz is a good starting point. Your receiver might automatically detect an optimal setting, or you may need to adjust it later based on your room and speakers.
- Speaker Size: If you’re not using a dedicated LFE connection and are using stereo line-outs, you might need to set your main speakers to “Large” to ensure they’re still getting some bass, and the subwoofer will handle the rest. If you are using an LFE/Subwoofer out, your receiver will often correctly manage this based on the LFE signal.
Testing and Fine-Tuning Your Subwoofer
You’ve made the connections, powered everything up, and configured the basics. Now it’s time to see and hear the results and make it sound just right for your space.
Playing Test Content
The best way to test your subwoofer is to play content that you know has prominent bass.
- Movie Scenes: Think action-packed movie scenes with explosions, car chases, or deep musical scores.
- Music Tracks: Certain music genres, like electronic dance music, hip-hop, or even some orchestral pieces, will have significant low-end frequencies.
- Receiver’s Built-in Test Tones: Most AV receivers have a built-in speaker calibration or test tone feature. You can run this, and it will play a tone through each speaker, including the subwoofer. This is a great way to confirm that the subwoofer is receiving and producing sound.
Adjusting Volume and Crossover
This is where you fine-tune the subwoofer’s contribution to your overall sound.
- Subwoofer Volume: Start with the subwoofer’s volume knob (if it has one) at about the halfway point. Play your test content and adjust the subwoofer’s volume until the bass feels balanced with your other speakers. You don’t want it to be boomy and overpowering, nor do you want it to be so subtle that you barely notice it. It should complement, not dominate.
- Receiver Volume vs. Subwoofer Volume: Remember that the overall volume you adjust on your receiver will affect everything. The subwoofer’s specific volume knob allows you to fine-tune its contribution independently of the main volume.
- Crossover Refinement: If your test content reveals that your main speakers are struggling with the bass you’ve set, or if the bass sounds disconnected, you might need to slightly adjust the crossover frequency. If you have a dedicated LFE connection, the receiver’s crossover setting is usually the primary one to adjust. If you’re using stereo line-outs, the subwoofer’s own crossover control (if it has one) becomes more important. Experimenting is key here.
Placement also plays a huge role in how your subwoofer sounds. For more on getting the best out of your speakers, you might find our tips on how to set up speakers for best sound helpful, as many of the principles apply to subwoofer placement too.
Troubleshooting Common Issues
Even with the best intentions, you might encounter a hiccup. Here are a few common problems and their solutions:
- No Sound from Subwoofer: Double-check all cable connections. Ensure the subwoofer is powered on and the volume is not turned down to zero. Verify the subwoofer is enabled in your receiver’s setup menu. If using wireless, re-pair the subwoofer.
- Subwoofer is Boomy or Distorted: This is often a placement issue or an issue with the crossover setting. Try moving the subwoofer to a different location in the room. Experiment with the crossover frequency – too high can cause overlap with your main speakers, and too low might leave a gap. Reducing the subwoofer’s volume can also help.
- Humming or Buzzing Noise: This usually indicates a ground loop or interference. Try plugging your receiver and subwoofer into the same power strip or surge protector. Ensure your RCA cables are good quality and well-shielded. Sometimes, moving the subwoofer away from other electronic devices can help.
- Bass Seems Weak or Lacking: Ensure the subwoofer is set to “On” or “Auto” on the subwoofer itself. Check the receiver’s settings and confirm the crossover is set appropriately. Try increasing the subwoofer’s volume slightly.
If you’ve tried these steps and are still facing issues, consulting the manuals for both your AV receiver and your subwoofer is highly recommended, as specific troubleshooting steps can vary by manufacturer.
Conclusion: Enjoy Your Enhanced Audio!
Congratulations! You’ve successfully navigated the process of how to connect a subwoofer to your home theater sound box. By understanding your equipment, identifying the right ports, making secure connections, and performing some basic setup and tuning, you’ve unlocked a new dimension of audio performance. The deep, resonant bass will add a thrilling layer to your movies, an impactful punch to your music, and an overall more immersive and engaging experience. Enjoy every boom, rumble, and thrum!
Frequently Asked Questions
What kind of cable do I need to connect a subwoofer to my home theater system?
You will typically need an RCA subwoofer cable, also known as an LFE cable. This cable is specifically designed to carry low-frequency signals and is shielded to prevent interference, ensuring a clean and powerful bass response.
My receiver doesn’t have a dedicated “Subwoofer Out” port. What should I do?
If your receiver lacks a dedicated subwoofer or LFE out, you can often use the stereo “Line Out” or “Audio Out” ports. You’ll need a standard stereo RCA cable to connect the left and right outputs from your receiver to the corresponding L/R inputs on your subwoofer.
How do I set the crossover frequency on my subwoofer or receiver?
The crossover frequency determines where the bass frequencies are sent. A good starting point for most systems is around 80Hz. You can set this in your AV receiver’s menu. If your subwoofer has its own crossover control, you might need to set it to its highest setting or “LFE” mode if using a dedicated receiver output, and let the receiver manage the crossover.
Can I connect a subwoofer wirelessly?
Yes, many modern subwoofers and home theater systems offer wireless connectivity. This usually involves a pairing process between the subwoofer and a transmitter connected to your receiver, or integrated wireless technology within both components. It offers great convenience and reduces cable clutter.
What if I hear a humming sound from my subwoofer after connecting it?
A humming or buzzing sound often indicates a ground loop or electrical interference. Try plugging both your receiver and subwoofer into the same power outlet or surge protector. Ensure you are using good quality, shielded RCA cables and try moving the subwoofer away from other electronic devices.
Do I need to connect power to the subwoofer even if it’s wirelessly connected?
Yes, absolutely. Even if your subwoofer connects wirelessly to your receiver for the audio signal, it has its own internal amplifier that requires a direct power connection to a wall outlet or surge protector to function.


