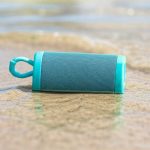
Got sand and salt on your waterproof speaker? No sweat! Here’s a super simple way to clean it so your beach tunes keep blasting. Just a few easy steps, and your speaker will be like new, ready for your next adventure.
Hey there, tech adventurers! Max here from AffTechy.com, your go-to spot for making gadgets easy and fun. You know how much I love bringing you along on the tech journey, right? We’ve all been there – you’ve got your trusty waterproof speaker, ready to soundtrack your epic beach day. The music’s pumping, the vibes are high, and then… life happens!
Maybe a rogue wave splashed over it, or a sandy frisbee took a detour. Suddenly, your awesome speaker looks a little less awesome. It’s a common story, and honestly, it can feel a bit nerve-wracking. You want to keep that speaker in top shape, but you also don’t want to mess it up by cleaning it wrong.
That’s where I come in! Today, we’re diving deep into the simple, brilliant way to clean your waterproof speaker after a sandy, salty adventure. We’ll cover everything from what to do right away to those little nooks and crannies. Get ready to make your speaker sparkle and sing again. Let’s break it down step by step!
Why Your Waterproof Speaker Needs a Little Love
So, you bought a waterproof speaker because, well, you love the beach, the pool, or just spontaneous adventures. That’s smart! These speakers are built tough. They can handle splashes, rain, and sometimes even a quick dip.
But even tough guys need a little care. Sand is like tiny, gritty sandpaper. Saltwater can be corrosive. If you leave that stuff on your speaker, it can slowly damage the materials. It might affect the sound quality, the buttons, or even the charging port over time.
Think of it like this: you wouldn’t wear sandy shoes inside your house, right? Your speaker deserves the same consideration. A quick clean-up after a beach party keeps it looking good and, more importantly, sounding great for ages. Plus, it’s way easier to clean it right after the fun, before things get baked on!
What “Waterproof” Really Means (and Why it Matters for Cleaning)
Before we grab the cleaning supplies, let’s quickly touch on what “waterproof” means for your speaker. Most speakers come with an IP rating. You’ve probably seen something like “IPX7” or “IP67” on the box. That little code tells you how well it’s protected against dust and water.
The “X” usually means it hasn’t been tested for dust resistance, while the number after it tells you about water resistance. For example, IPX7 means it can handle being submerged in water up to 1 meter for about 30 minutes. IP67 means it’s dust-tight AND can handle submersion.
This is super important for cleaning because it tells you how much water your speaker can actually handle. For most waterproof speakers, a gentle rinse with fresh water is perfectly fine. However, always check your speaker’s specific rating and manufacturer’s instructions!
Some fancy speakers might have special seals or openings that need extra care. Knowing your IP rating helps you avoid accidentally damaging your speaker during cleaning. It’s like knowing the difference between a splash and a full dive!
Step-by-Step: How to Clean Your Waterproof Speaker After the Beach
Alright, the party’s over, and your speaker might have a bit of sand clinging to it. Don’t panic! Here’s your simple, go-to guide for a brilliant beach fix.
Step 1: Shake Off Loose Debris
First things first, take your speaker outside or over a trash can. Gently shake it to get rid of any loose sand, dirt, or bits of shell. This prevents you from just rubbing that grit into the speaker when you start wiping.
Be gentle here! You don’t want to shake it so hard that you dislodge any internal components. Just a good, firm shake is usually enough to dislodge the surface stuff. Think of it as a pre-wash for your speaker.
Step 2: The Fresh Water Rinse
This is the most important step for salt and sand. Grab some clean, fresh tap water. You can use a faucet, a hose with a gentle spray, or even a clean bowl of water.
Rinse the speaker thoroughly. Make sure water gets into all the nooks and crannies where sand might be hiding. If your speaker is rated IPX7 or higher, a good rinse is usually totally safe. Just ensure all ports are covered or that you don’t directly spray water into them if they aren’t sealed.
Some people worry about using tap water, but for most modern waterproof speakers, it’s perfectly fine. The key is to use fresh water to wash away the salt water and sand. If you have very hard water, you might want to use filtered water, but it’s rarely an issue.
Step 3: Gentle Scrubbing (If Needed)
For stubborn sand or grime, you might need a little gentle scrubbing. Use a soft-bristled brush. An old toothbrush works wonders for this! You can also use a soft cloth or a sponge.
Dampen your brush or cloth with fresh water. Gently go over any areas with stuck-on dirt. Pay special attention to speaker grilles, buttons, and any seams where sand can collect. Remember, we’re being gentle here to avoid scratching or damaging the speaker.
Avoid using harsh chemicals, abrasive cleaners, or anything with alcohol. These can damage the speaker’s finish, plastic, or even its water-resistant coating. Stick to water and a soft brush for best results.
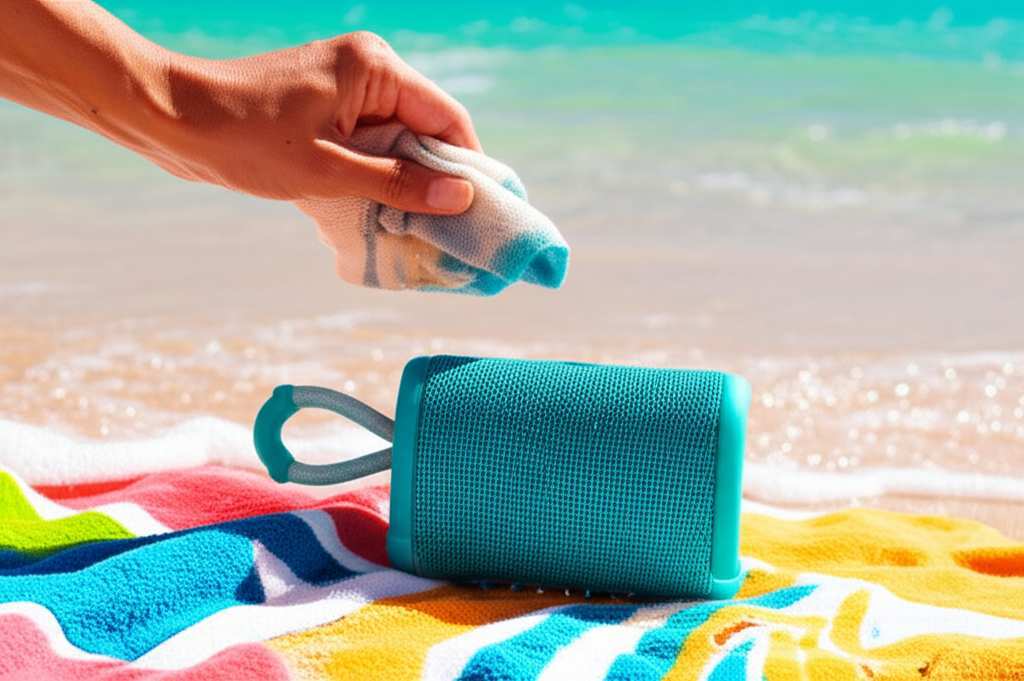
Step 4: Wipe Down and Dry
After rinsing and scrubbing, use a clean, soft, lint-free cloth to wipe down the entire speaker. Microfiber cloths are excellent for this. They absorb water well and won’t leave fuzzy bits behind.
Gently pat and wipe away all excess moisture. Make sure to dry all the external surfaces. Pay attention to any openings, like the charging port or auxiliary input, and gently dry around them.
Once the exterior is dry, leave the speaker to air dry completely. It’s best to place it in a well-ventilated area at room temperature. Avoid direct sunlight or high heat, as this can also damage the speaker.
Step 5: Check and Clean Ports
This is a crucial step that many people overlook. After drying, take a close look at the charging port and any other openings. Sometimes, tiny grains of sand can get lodged in there.
You can use a dry cotton swab (Q-tip) to gently clean out these ports. Be very careful not to push anything further in or damage the delicate connectors. If you see any moisture still, you can try using a gentle puff of air – like from a camera lens blower or even just blowing softly.
Never use a vacuum cleaner for this, as static electricity can damage the electronics. A dry cotton swab or a soft, dry brush is your best bet. Ensuring these ports are clean and dry is vital before you plug in your charging cable!
Dealing with Tougher Grime and Salt Stains
Sometimes, beach adventures leave behind more than just sand. Saltwater can leave a white residue, and sticky stuff like sunscreen or soda can make things really grimy.
For salt stains, a rinse with fresh water is usually enough. If you see a faint white film, try gently wiping it with a cloth slightly dampened with distilled water. Distilled water has no minerals, so it won’t leave its own marks.
If there’s sticky residue, you can try a very mild soap solution. Mix a tiny drop of dish soap with water. Dampen a cloth with this solution and gently wipe the sticky spots. Afterward, you must rinse the speaker thoroughly with fresh water to remove any soap residue, and then dry it completely.
Always remember to check your speaker’s manual for specific cleaning recommendations. Some manufacturers might advise against even mild soap. When in doubt, stick to fresh water and gentle wiping!
Quick Tips for Maintaining Your Waterproof Speaker
Keeping your speaker in prime condition isn’t just about cleaning after a beach trip. Here are some extra tips to make sure it lasts:
- Dry it off after splashes: Even if it’s waterproof, it’s good practice to wipe down your speaker with a soft cloth after it gets wet, especially if it’s saltwater.
- Keep it out of extreme heat: Don’t leave your speaker baking in direct sunlight on a hot day. High temperatures can damage the battery and electronics.
- Check seals regularly: If your speaker has a rubber seal around charging ports, make sure it’s clean and intact. A damaged seal can compromise its water resistance.
- Charge with clean ports: Always ensure the charging port is completely dry and free of debris before plugging in the charging cable.
- Store it properly: When not in use, store your speaker in a cool, dry place, away from dust and direct sunlight.
These little habits can make a big difference in the lifespan and performance of your waterproof speaker. It’s like giving it a spa treatment now and then!
Comparing Waterproof Speaker Features
When you’re looking at waterproof speakers, there are a few key features that matter. Understanding these can help you choose the right one and know how to care for it.
Here’s a quick rundown of what to look for and why:
IP Rating: As we discussed, this is crucial. IPX7 is great for splashes and rain, while IP67 offers dust protection too. Look for the highest rating your budget allows if you’re a serious beachgoer!
Battery Life: How long can it play? For a full day at the beach, you’ll want at least 10-15 hours. Some high-end models offer 20+ hours!
Sound Quality: This is subjective, but look for reviews mentioning balanced sound, good bass, and clarity at higher volumes. For outdoor use, a speaker that can get loud without distortion is key.
Connectivity: Bluetooth version matters. Newer versions (like Bluetooth 5.0 and above) offer better range, faster pairing, and more stable connections. Some speakers also have aux-in ports for wired connections.
Durability: Beyond waterproofing, consider shock resistance. Some speakers are built to withstand drops, which is handy if you’re prone to fumbles.
To give you a clearer picture, let’s look at a sample comparison table:
| Feature | Model A (Budget) | Model B (Mid-Range) | Model C (Premium) |
|---|---|---|---|
| IP Rating | IPX6 | IP67 | IP67 |
| Battery Life (Hours) | 8-10 | 12-15 | 20+ |
| Sound Output (Watts) | 10W | 20W | 30W+ |
| Bluetooth Version | 4.2 | 5.0 | 5.2 |
| Portability | Compact, Lightweight | Medium, Integrated Handle | Larger, Robust Build |
| Price Range (USD) | $30 – $60 | $70 – $150 | $150 – $300+ |
See how the features change with the price? The Model A is great for casual use, but it might not handle submersion or offer the best sound. Model B offers a solid balance of features, including dust and water resistance (IP67), which is fantastic for beach days. Model C is for the audiophile who needs top-tier sound and all the bells and whistles, plus the longest battery life for all-day parties.
When choosing, think about where you’ll use it most. If it’s just for poolside lounging, an IPX6 might be fine. But if you’re heading to the ocean or a sandy cove, that IP67 rating becomes your best friend! It means you can worry less about the elements and more about the music.
For more in-depth reviews and comparisons, sites like CNET often have comprehensive guides on the latest portable speakers, detailing their waterproof capabilities and sound performance.
Fun Fact: The Evolution of Waterproof Tech
Did you know that the concept of making electronics water-resistant has come a long way? Early portable electronics were incredibly delicate. Even a bit of humidity could cause problems. The development of robust seals, advanced materials, and rigorous testing standards like the IP ratings we talked about has revolutionized how we can use our gadgets.
This evolution means you can now take your music anywhere – from the shower to the kayak – with confidence. It’s a testament to engineering innovation, making our tech more integrated with our active lifestyles. So, next time your speaker gets a splash, remember the tech wizardry that makes it possible!
Another interesting tidbit: The term “waterproof” is often a bit of a misnomer in consumer electronics. Most devices are “water-resistant” to a certain degree, meaning they can withstand specific conditions for a limited time. True “waterproof” items would theoretically be impervious to water indefinitely, which is much harder and more expensive to achieve. That’s why checking the IP rating is so important – it tells you the actual limits.
Frequently Asked Questions (FAQs)
Q1: Can I use soap to clean my waterproof speaker?
For most waterproof speakers, it’s best to stick to fresh water. If there’s sticky residue, a tiny drop of mild dish soap mixed with water can be used, but you MUST rinse it thoroughly with fresh water afterward and ensure it’s completely dry. Always check your speaker’s manual first!
Q2: What if my speaker falls in the ocean?
Don’t panic! If your speaker is rated for submersion (like IPX7 or IP67), rinse it immediately with fresh water. Saltwater can be corrosive. After rinsing, follow the drying steps carefully, paying extra attention to ports.
Q3: How do I get sand out of the speaker grille?
A soft-bristled brush, like an old toothbrush, is perfect for this. Gently brush the sand away while the speaker is damp with fresh water. You can also try a gentle puff of air.
Q4: Can I use a hairdryer to dry my speaker?
No, it’s not recommended. Heat from a hairdryer can damage the speaker’s materials and internal components. Air drying in a well-ventilated area at room temperature is the safest method.
Q5: My speaker still sounds muffled after cleaning. What’s wrong?
This could happen if sand or debris is still lodged deep inside the speaker grille or if the speaker was submerged for too long or in water it wasn’t designed for. Ensure it’s completely dry and try cleaning the grille again with a soft brush. If the problem persists, it might be worth contacting the manufacturer’s support.
Q6: How often should I clean my waterproof speaker?
You don’t need to clean it after every use unless it’s gotten particularly dirty (like after a beach trip!). A quick wipe-down after getting wet is good. A more thorough cleaning, like the one we discussed, is best after exposure to sand, salt, or grime.
Q7: Can I submerge my speaker if it’s only rated IPX5?
No. An IPX5 rating means it can withstand low-pressure water jets from any direction. It’s protected against splashes but not submersion. Submerging it could damage the speaker. Always stick to the manufacturer’s guidelines for its IP rating.
Conclusion: Keep the Music Playing, Sand or Not!
There you have it! Cleaning your waterproof speaker after a fantastic beach day is super straightforward. By following these simple steps – a good shake, a fresh water rinse, gentle scrubbing if needed, thorough drying, and a check of those ports – you’ll keep your speaker in top condition.
Remember, a little care goes a long way. It ensures your speaker keeps delivering awesome sound for all your future adventures, whether you’re by the ocean, the pool, or just enjoying your backyard. Don’t let a little sand or salt stop the party!
So go forth, enjoy your music, and know that you’ve got this covered. Now go enjoy amazing sound and make every moment louder and better!