Attach your Bluetooth speaker securely to your hiking gear for hands-free music on the trail. It’s easier than you think to enjoy your tunes safely and conveniently.
Hey there, fellow adventurers! Ever been out on a beautiful hike, surrounded by nature’s amazing soundtrack, and wished you could add your own favorite tunes? I know I have! Music can really make a hike feel special, can’t it? But then comes the question: how do you bring your Bluetooth speaker along without it bouncing around, getting in the way, or worse, falling off a cliff? It can feel a bit tricky figuring out the best way to attach it, especially if you’re not super techy.
Don’t worry, that’s exactly why I’m here! We’re going to walk through this together, step by step. Think of me as your friendly guide, showing you the simple ways to make sure your speaker stays put. We’ll cover everything from choosing the right gear to making sure your music is ready to go when you are. It’s all about making your hiking experience better and a lot less stressful.
Ready to discover how to bring your soundtrack to the summit? Let’s break it down and get you ready for your next trek with your tunes in tow!
Why Bother Attaching Your Speaker?
You might be wondering why you can’t just shove your speaker in your backpack. Well, think about it! When your speaker is easily accessible, you can control your music without stopping. You can adjust the volume, skip a track, or even answer a call without digging through your pack. Plus, when it’s securely attached, it’s less likely to get damaged if you stumble or take a tumble.
Imagine this: you’re climbing a steady incline, the sun is warm, and a perfect song comes on. If your speaker is clipped right to your belt or backpack strap, you can enjoy that boost of energy instantly. If it’s buried deep in your bag, you miss that moment. It’s all about convenience and keeping your adventure flowing smoothly.
And let’s be honest, sometimes a little bit of your favorite music can push you through those tough miles. Having it readily available makes that possible. It’s like having your own personal hype-man or a soothing soundtrack for those peaceful moments.
What Kind of Speaker is Best for Hiking?
Before we talk about attaching, let’s quickly chat about the speaker itself. Not all speakers are created equal when it comes to hitting the trails. You want something that’s tough and can handle a bit of the outdoors.
Durability is Key: Look for speakers that are advertised as rugged, water-resistant, or even waterproof. This means a little rain or a splash from a stream won’t ruin your fun.
Size Matters: You don’t want something too big or heavy. A compact speaker is easier to carry and attach.
Battery Life: Long hikes need long battery life! Check how many hours of playback a speaker offers on a single charge.
Sound Quality: While you don’t need concert-hall sound, a speaker that sounds good even at moderate volumes is a plus.
Many brands offer fantastic portable Bluetooth speakers that fit these criteria. Some even come with built-in carabiners or loops, which makes attaching them a breeze. We’ll talk more about specific features later, but keep these points in mind as you consider your audio companion for the trail.
Your Options for Attaching: The Gear Guide
Alright, let’s get down to the nitty-gritty of how to actually attach your speaker. There are a few main ways to do this, and the best one for you will depend on your hiking gear and personal preference.
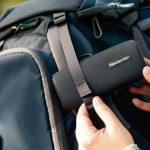
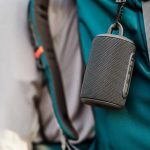
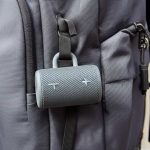
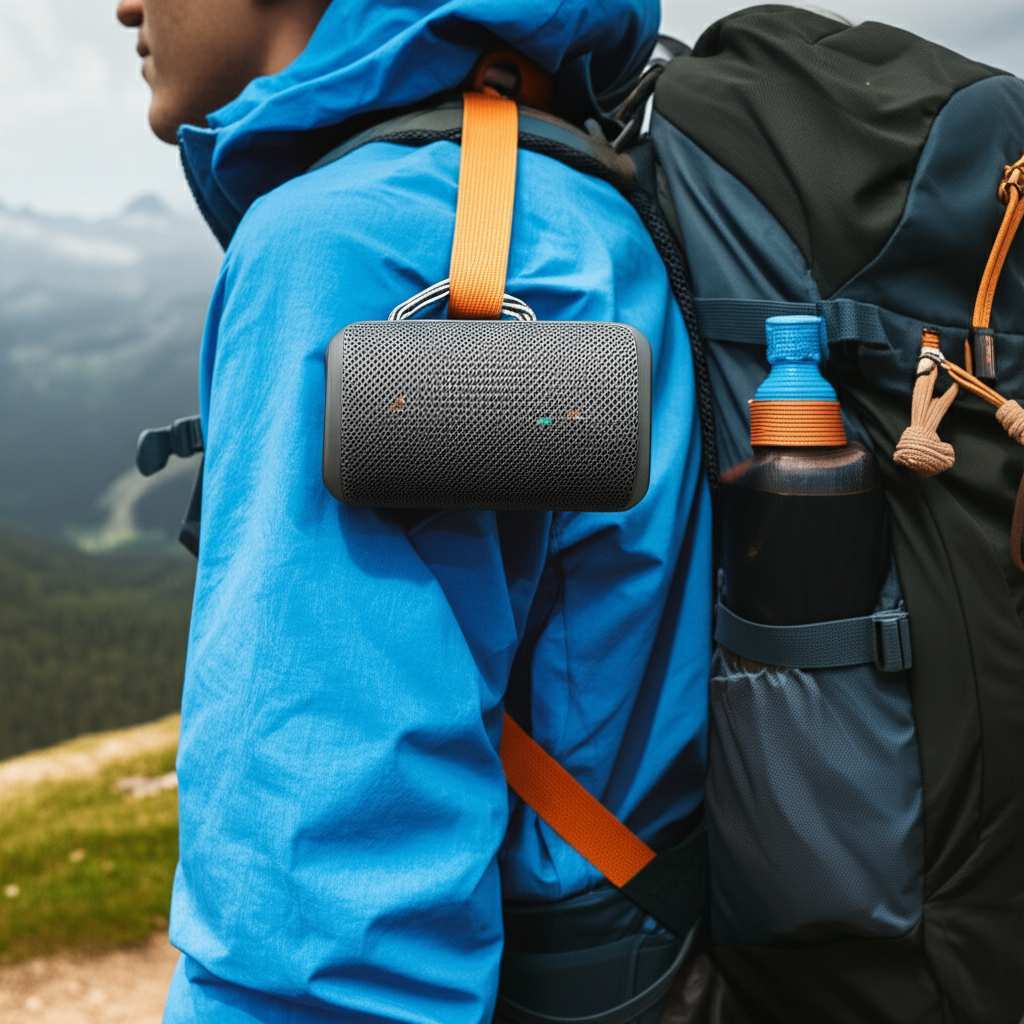
1. Using Built-in Carabiners or Loops
This is the easiest method if your speaker has one! Many portable Bluetooth speakers are designed with hikers and travelers in mind. They often come with a sturdy loop or a metal carabiner attached.
How it Works: You simply clip this carabiner or loop onto a strap, buckle, or daisy chain on your backpack, belt, or even a water bottle holder.
Pros: Super simple, no extra gear needed, quick to attach and detach.
Cons: Only works if your speaker has this feature. The attachment point might not always be perfectly positioned.
Some popular speakers that often include this feature are from brands like JBL, Anker, and Ultimate Ears. They’re designed for active lifestyles, so they think about these little conveniences!
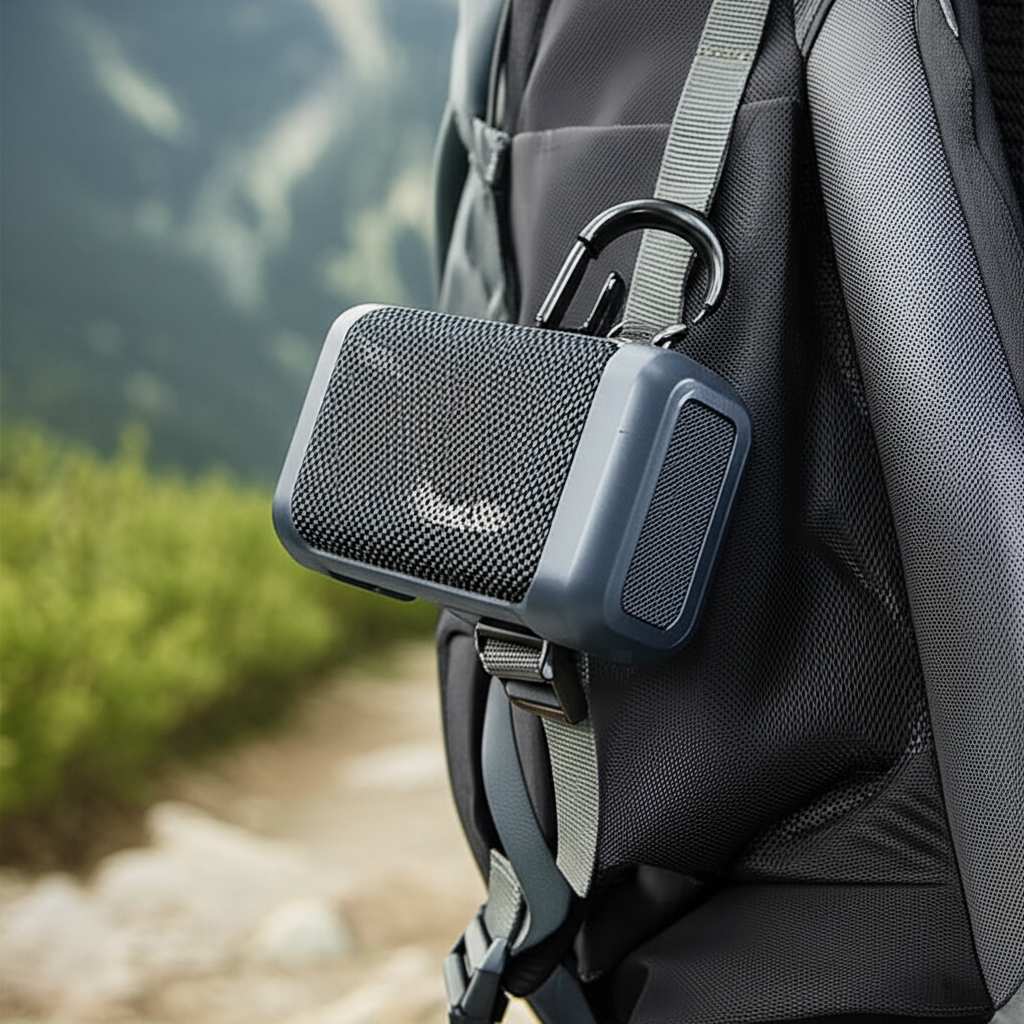
2. Carabiner Clips and Straps
If your speaker doesn’t have a built-in loop, don’t fret! You can easily add your own attachment point using a simple carabiner clip.
How it Works: You’ll need a small, sturdy carabiner and perhaps a short strap or a sturdy piece of cord (like paracord). Loop the strap or cord through a secure part of your speaker (like a handle or a strong mesh section) and then clip the carabiner through the loop of the strap and onto your gear.
Pros: Very versatile, works with almost any speaker, allows you to choose where to attach it.
Cons: Requires purchasing a separate carabiner and maybe a strap or cord. Can sometimes be a bit fiddly to get just right.
When choosing a carabiner, opt for one that’s designed for outdoor use, not just a keychain. A simple aluminum climbing-style carabiner works well. For straps, a strong Velcro strap or a short length of paracord tied securely is a great choice.
3. Dedicated Speaker Holsters or Pouches
For the ultimate in security and convenience, you can get specialized pouches or holsters for your Bluetooth speaker.
How it Works: These are essentially small bags or sleeves designed to snugly fit a specific speaker or a range of speaker sizes. They often have their own integrated straps or loops for attaching to your gear. Some might even have extra pockets for cables or your phone.
Pros: Provides excellent protection for the speaker, keeps it very secure, often designed for easy access.
Cons: Can be an extra purchase, might add a bit of bulk, and you need to find one that fits your speaker perfectly.
These are great if you plan on using your speaker frequently on hikes and want it to be well-protected. Brands like Kenu or even generic camera bag manufacturers sometimes make pouches that work well for small speakers.
4. Securing to a Belt or Harness Directly
This is where we get specific about how to attach it to your hiking belt or harness. This often involves using straps or clips.
How it Works: If you have a hiking belt with MOLLE webbing (those little loops you see on some tactical or outdoor gear), you can use MOLLE clips or straps to attach a carabiner or a small pouch. If you have a standard hiking belt, you can usually thread a sturdy strap or even the speaker’s own loop directly through the belt loops. For a backpack harness (the straps that go over your shoulders), you can use carabiners or Velcro straps to attach to the chest strap or shoulder strap loops.
Pros: Keeps the speaker very accessible, allows for quick adjustments, can distribute weight nicely.
Cons: Requires specific types of belts or harnesses, or the right accessories to make it work.
Let’s dive deeper into the best spots on your gear.
Attaching to Your Hiking Belt
Your hiking belt is a fantastic place for your speaker because it’s usually at a comfortable height.
Using a Carabiner: If your belt has loops or MOLLE webbing, clip a carabiner through one of these. Then, attach your speaker’s loop or a strap around the speaker to that carabiner.
Using a Strap: If your belt is a simple fabric belt, you might be able to thread a strong Velcro strap through the belt loops and then around your speaker. Make sure it’s snug!
Consider the Placement: Try to attach it to the side or back of your belt. You don’t want it digging into your stomach or getting in the way when you sit down.
Attaching to Your Backpack Harness
Your backpack harness is another prime spot. The shoulder straps and chest strap offer plenty of options.
Shoulder Strap Loops: Many backpack shoulder straps have small loops or daisy chains. These are perfect for clipping a carabiner with your speaker attached.
Chest Strap: The adjustable chest strap can also be a good anchor point. You can often loop a strap around the chest strap and then secure your speaker.
Keep it Balanced: If you attach your speaker to one shoulder strap, consider if it throws off your balance. You might need to adjust it or add something of similar weight to the other side if it feels off.
5. DIY Solutions
Feeling crafty? You can always create your own custom solution!
Paracord Magic: A length of paracord is incredibly useful. You can tie a secure loop around your speaker and then create a hitch or knot to attach it to your belt or backpack. There are tons of knot-tying tutorials online!
Velcro Straps: Heavy-duty Velcro straps can be found at hardware stores. You can use these to create a secure wrap around your speaker and then attach it to your gear.
Remember, with DIY, the key is to make sure whatever you rig up is really secure. You don’t want your speaker coming loose on a bumpy trail.
Choosing the Right Spot: Comfort and Security
Where you attach your speaker is just as important as how you attach it. Here are some things to consider:
Accessibility: Can you reach it easily to control your music?
Comfort: Does it dig into you, or get in the way when you walk, sit, or climb?
Security: Is it unlikely to snag on branches or get knocked off?
Balance: Does it feel balanced on your body, or is it pulling you to one side?
Generally, attaching to the side of your backpack strap, the side of your hip belt, or the back of your belt often works best. Avoid attaching it directly in front of your stomach or where it could easily catch on low-hanging branches.
A Quick Look at Speaker Attachment Features
Here’s a handy table comparing common attachment features you might find on speakers or that you can add:
| Attachment Method | Pros | Cons | Best For |
|---|---|---|---|
| Built-in Carabiner/Loop | Easiest, no extra gear | Speaker must have it, limited placement | Quick trips, casual hikers |
| Separate Carabiner & Strap | Versatile, works with any speaker | Requires extra gear, can be fiddly | Most speakers, customizable placement |
| Dedicated Pouch/Holster | Best protection, very secure | Extra purchase, might add bulk | Frequent use, speaker protection needed |
| DIY (Paracord/Velcro) | Customizable, can be very secure | Requires skill, needs testing | Specific needs, budget-conscious |
This table gives you a quick overview. If your speaker has a built-in carabiner, that’s often your simplest path. But if it doesn’t, a good carabiner and strap combo is usually the most flexible and reliable option for most hikers.
Making Sure It Stays Put: Tips for a Secure Fit
No matter which method you choose, a few extra steps can ensure your speaker stays with you on your journey.
Double-Check Connections: Every time you attach your speaker, give it a good tug. Make sure the carabiner is fully closed, the strap is snug, and everything feels solid.
Test Before You Go: Before heading out on a long hike, do a short walk around your neighborhood or in a park. Move around, bend over, and see if the speaker stays put. This helps you identify any potential issues.
Consider the Terrain: If you know you’ll be scrambling over rocks or bushwhacking through dense trails, you might want to secure your speaker extra carefully, perhaps tucking it into a pouch or using a strong strap.
Avoid Dangling: Try to position the speaker so it doesn’t dangle too loosely. A dangling object can swing around, catch on things, and be annoying. A snug fit is usually best.
Speaker vs. Your Gear: Compatibility Check
Sometimes, the type of gear you have makes a big difference.
Backpacks with MOLLE: If your backpack has MOLLE webbing, you can get MOLLE-compatible straps or pouches. These are designed to weave through the webbing and create a very secure attachment.
Padded Hip Belts: Padded hip belts on larger backpacks offer great stability. You can often clip a carabiner or strap to the side of these.
Minimalist Vests: For trail running or ultra-light hiking, vests have lots of small loops and straps that are perfect for smaller, lighter speakers.
Simple Daypacks: Most simple daypacks have straps and loops that are easy to use with carabiners.
It’s always a good idea to look at your specific hiking gear and see what attachment points are available.
Fun Fact Break!
Did you know that some Bluetooth speakers are designed with specific outdoor activities in mind? For example, speakers with IPX7 waterproofing can actually be submerged in up to 1 meter of water for 30 minutes! While you hopefully won’t drop your speaker in a lake, this level of protection means it can easily handle heavy rain or splashes from a waterfall. Pretty neat, right?
Popular Speakers with Great Attachment Options
Looking for a speaker that’s already trail-ready? Here are a few types of speakers that often come with good attachment features:
JBL Clip Series: As the name suggests, these speakers have a built-in carabiner that’s perfect for clipping onto backpacks or belts. They are also rugged and water-resistant.
Anker Soundcore Series: Many Anker speakers, like the Soundcore 2 or Flare, have a loop or a sturdy eyelet where you can attach a carabiner or strap. They offer great sound for their size.
Ultimate Ears (UE) Speakers: Models like the UE Boom and Wonderboom often have a fabric loop at the top, making it easy to clip them onto gear. They are known for their 360-degree sound and durability.
When checking out a speaker, always look at the product description or images for any loops, clips, or attachment points. Reviews from other hikers can also be a great source of information!
Troubleshooting Common Attachment Issues
Even with the best intentions, sometimes things don’t go perfectly. Here are a few common hiccups and how to fix them:
Speaker feels too heavy and pulls down straps:
Solution: Try attaching it to your hip belt instead of your shoulder strap. Or, use a wider strap or a more robust carabiner that distributes the weight better. If it’s consistently too heavy, consider a smaller speaker.
Carabiner keeps opening:
Solution: Make sure you’re using a locking carabiner, or at least one with a secure gate. If it’s a basic carabiner, try to position it so the gate faces inward, away from anything that could press it open. You can also use a small piece of tape or a zip tie to secure the gate temporarily.
Strap slips off the speaker:
Solution: Ensure the strap is tight enough. If the speaker has a grippy texture, that helps. For speakers with smooth surfaces, you might need to use a strap that has a rubberized interior or wrap it a couple of times.
Speaker snags on branches:
Solution: Position the speaker on the side or back of your body where it’s less likely to encounter obstacles. A more compact speaker or one in a pouch might also reduce snagging.
How to Choose the Right Speaker for Your Hiking Style
Your hiking style plays a big role in what kind of speaker and attachment method works best.
For the Day Hiker:
Focus: Light weight, ease of access, moderate battery life.
Best Attachment: Built-in carabiner or a simple carabiner clip on a shoulder strap or hip belt.
Speaker Type: Compact, durable, water-resistant speakers like the JBL Clip or a small Anker Soundcore.
For the Backpacking Trekker:
Focus: Long battery life, ruggedness, secure attachment that won’t get in the way during multi-day trips.
Best Attachment: Dedicated pouch secured with straps to the hip belt or backpack frame, or a very secure paracord/strap system.
Speaker Type: Slightly larger speakers with excellent battery life and robust waterproofing.
For the Trail Runner:
Focus: Ultra-light, minimal bounce, very secure and streamlined attachment.
Best Attachment: Small speaker clipped directly to a running vest strap, or a specialized running vest with a built-in holder.
Speaker Type: The smallest and lightest speakers, often designed to be clipped and forgotten until you want to use them.
Let’s Talk About Sound: What to Expect
When you’re hiking, you’re not just attaching a speaker; you’re bringing a personal soundtrack to your adventure. What can you expect from these portable devices?
Volume Levels: Portable Bluetooth speakers can get surprisingly loud, especially in open spaces. However, always be mindful of your surroundings and other hikers. Respecting nature and fellow adventurers means keeping the volume at a reasonable level.
Sound Quality Outdoors: Sound behaves differently outdoors than it does indoors. Wind, distance, and ambient noise can all affect how clear your music sounds. A speaker with good bass response and clear mids and highs will perform better.
Battery Life Considerations: A speaker’s stated battery life is usually based on moderate volume. If you blast your music continuously, you’ll likely get less playtime. It’s always a good idea to carry a portable power bank on longer hikes, just in case!
For a deeper dive into portable audio, you can check out reviews and guides on sites like CNET, which often have detailed comparisons and performance tests.
Essential Accessories for Your Hiking Speaker Setup
Beyond the speaker itself, a few accessories can enhance your experience:
Portable Power Bank: For extended trips, a power bank is a lifesaver to recharge your speaker (and phone!).
Waterproof Pouch: Even if your speaker is water-resistant, an extra waterproof pouch offers peace of mind in really wet conditions.
Extra Carabiners/Straps: Having a few spare carabiners or Velcro straps means you can adapt your attachment method if needed.
Paracord: As mentioned, paracord is incredibly versatile for DIY solutions and quick fixes.
Having these on hand means you’re prepared for almost anything the trail throws at you.
Protecting Your Speaker: Maintenance Tips
To keep your speaker sounding great and lasting for many hikes to come, a little maintenance goes a long way.
Clean After Use: If you hike in dusty or muddy conditions, wipe down your speaker with a dry cloth. If it got really dirty, use a slightly damp cloth, but avoid getting water into any ports.
Charge Properly: Don’t leave your speaker plugged in constantly after it’s fully charged. Follow the manufacturer’s recommendations for battery care.
Store Safely: When not in use, store your speaker in a cool, dry place. If you have the original box or a protective pouch, use it.
* Check Attachment Points: Periodically inspect the loops, carabiners, and straps you use for any signs of wear and tear. Replace them if they look damaged.
Taking care of your gear means it will be ready for your next adventure without any surprises.
Frequently Asked Questions (FAQ)
Q1: Can I really attach any Bluetooth speaker to my hiking gear?
A1: Yes, you generally can! While some speakers are designed with attachment points, you can always use universal methods like carabiners, straps, or DIY solutions to secure almost any speaker. The key is to make sure it’s snug and won’t fall off.
Q2: Will attaching my speaker make my hike uncomfortable?
A2: It shouldn’t, if you attach it correctly! The goal is to find a spot on your backpack or belt that’s accessible but doesn’t interfere with your movement or cause pressure points. Experiment with different locations to find what feels best for you.
Q3: What’s the best way to protect my speaker from the elements?
A3: Look for speakers with a high IP rating (like IPX5 or higher for water resistance). For extra protection against rain or splashes, consider using a dedicated waterproof pouch or holster. Always wipe it down after a wet or dusty hike.
Q4: How loud can these hiking speakers get? Is it annoying for others?
A4: They can get quite loud, but it’s super important to be considerate of other hikers and wildlife. Keep the volume at a level where you can enjoy your music without disturbing others. Often, a moderate volume is perfect for personal enjoyment on the trail.
Q5: Do I need a special type of backpack or belt to attach a speaker?
A5: Not at all! While some backpacks have specific loops (like MOLLE webbing) that make attachment easier, you can use carabiners and straps on almost any standard backpack or even a sturdy belt. You just need a point to clip or tie onto.
Q6: What if my speaker doesn’t have a loop or hole for a carabiner?
A6: No problem! You can use a strong, adjustable strap (like a Velcro strap) to wrap securely around the speaker itself. Then, you can attach a carabiner to the strap, or thread the strap through a belt loop or backpack strap to secure it.
Q7: How long does a Bluetooth speaker battery typically last on a hike?
A7: This varies a lot by speaker model and how loud you play it. Smaller speakers might offer 6-10 hours, while larger ones can go 15-20 hours or more. For longer trips, always carry a portable power bank to recharge.
Conclusion: Your Soundtrack Awaits!
There you have it! Attaching your Bluetooth speaker to your hiking gear is a fantastic way to elevate your outdoor adventures. We’ve explored different attachment methods, from simple carabiners to specialized pouches, and talked about where to place it for maximum comfort and security. Remember, the best setup is one that feels secure and doesn’t get in your way.
Don’t let a bulky speaker or the fear of it falling off hold you back from enjoying your favorite tunes on the trail. With these tips, you can confidently bring your music along. Experiment with what works best for your speaker and your hiking style.
Now go enjoy amazing sound and make every moment on the trail louder and better! Happy hiking and happy listening!