Looking to save space on your laptop or make file sharing easier? Compressing files is the perfect solution! It reduces the size of your data, making it more manageable and quicker to send or store. Whether you’re dealing with large documents, photos, or videos, learning how to compress files can save you both time and storage space. The process is simple and doesn’t require advanced technical skills. In this article, I’ll guide you through straightforward methods to compress files on your laptop, whether you’re using Windows or Mac. By the end, you’ll be able to shrink your files effortlessly, making your digital life more organized and efficient. Let’s dive into the easiest ways to compress files and optimize your laptop storage today.
To compress files on your laptop, you can use built-in features or third-party software. Simply select the files or folders you want to compress, right-click, and choose the “Compress” or “Zip” option. This creates a smaller, single archive that’s easy to share or store.
To get started, open your file explorer or finder, locate the files you want to compress, right-click, and select the compression option available. For Windows users, this is typically “Send to” > “Compressed (zipped) folder,” while Mac users can use the “Compress” option to create a zip file instantly. If you need more advanced features, there are many free and paid tools like WinRAR, 7-Zip, or WinZip that offer additional options for compressing and managing files more efficiently.

How to Compress Files on Laptop
Compressing files on your laptop is a useful way to save storage space and make sending files easier. This process reduces the size of your files or folders without losing any important data. Whether you need to email documents or store large files efficiently, knowing how to compress files is a valuable skill.
Understanding File Compression and Its Benefits
File compression shrinks files by removing redundant data, making them smaller while keeping the original information intact. This helps in saving storage space on your laptop, speeding up file transfers, and reducing upload or download times. Compressed files are especially handy when sharing via email or cloud services with size limits.
There are two main types of compression: lossless and lossy. Lossless compression, used for documents and data files, preserves all information. Lossy compression is applied to media files like images and videos, where some quality loss is acceptable to gain higher compression rates.
Choosing the Right Compression Format
Several formats are available for compressing files. The most common include ZIP, RAR, and 7Z. ZIP files are supported by most operating systems and are the easiest to create and open. RAR and 7Z formats offer higher compression ratios but may require extra software to open.
When selecting a format, consider compatibility, compression efficiency, and whether you want to encrypt files for security. ZIP remains the most popular choice for general purposes due to its widespread support and ease of use.
How to Compress Files on Windows Laptop
Using Built-in Windows Compression Tool
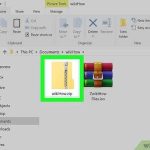
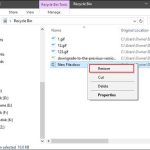
Windows has a simple way to compress files using the built-in ZIP feature. First, locate the files or folders you want to compress. Next, right-click on the selected items and choose Send to > Compressed (zipped) folder. A new ZIP file will appear in the same location.
You can rename this compressed file to anything you like. To extract files later, right-click the ZIP and select Extract All. This built-in method is quick and requires no extra software installations.
Using Third-Party Compression Software
If you need more advanced options or support for formats like RAR or 7Z, third-party programs are useful. Popular options include WinRAR, 7-Zip, and WinZip. Download and install one of these tools from their official websites.
After installation, right-click on your files or folders. Choose the software’s compression option, such as Add to archive in 7-Zip. Select your desired archive format, set your compression level, and click OK. The software creates a compressed file with your specifications.
How to Compress Files on Mac Laptop
Using macOS Built-in Compression Tool
Mac users can compress files easily through Finder. Select the files or folders you want to compress, then right-click and choose Compress Items. macOS automatically creates a ZIP archive of the selected items.
This ZIP file appears in the same location and can be renamed. To extract files from a ZIP archive, double-click it, and macOS will automatically decompress it into the same folder.
Using Third-Party Software on Mac
For support of other formats like RAR or 7Z, you can install software such as The Unarchiver or Keka. These tools offer additional features like password protection and higher compression ratios.
After installation, right-click your files and choose the option to compress via the third-party program. Follow the prompts to set preferences and create your compressed archive.
Tips for Effective File Compression
- Compress only what’s necessary: Avoid compressing very small files as the compression might not reduce size significantly.
- Use strong passwords: When encrypting compressed files, add a secure password to protect sensitive data.
- Choose the right format: ZIP is ideal for most uses, but RAR or 7Z can give better compression for large files.
- Test your archive: After compression, try extracting to ensure files are intact and accessible.
Best Practices for Managing Compressed Files
Store compressed files in organized folders so you can easily locate them later. Keep backups of important files before compressing or encrypting them. Regularly update your compression software to benefit from the latest features and security updates.
Common Issues and Solutions During File Compression
Sometimes, compressed files won’t open or extract properly. Ensure you use supported software compatible with your archive format. If a password-protected archive won’t open, verify that you entered the correct password.
If compression is slow, check your laptop’s resources. Running unnecessary background applications can affect performance. Also, verify that your software and operating system are up to date.
Enhancing Compression Efficiency
Adjust compression settings to balance between size reduction and processing time. Higher compression levels produce smaller files but take longer to compress. Use fast or normal settings for quick compression tasks and maximum compression for final versions.
Some software also allows splitting large archives into smaller parts, making it easier to upload or send via email.
Additional Related Topics
- How to Encrypt Files on Laptop
- Best Compression Software for Windows and Mac
- How to Share Compressed Files Securely
- Managing Storage Space with Compression Tools
Learning how to compress files on your laptop helps you manage storage, improve file sharing, and keep your data organized. Whether you use built-in features or third-party programs, compression makes handling large files much easier and more efficient.
How to Compress a Folder Tutorial ~ Compressing Folder ~ Class 5 : Computer
Frequently Asked Questions
What are the common file formats used for compressed files?
Popular compressed file formats include ZIP, RAR, and 7z. ZIP is widely supported across various operating systems and is easy to use. RAR offers higher compression ratios but may require specific software like WinRAR. The 7z format provides high compression efficiency and is suitable for reducing large files significantly.
Which tools are most effective for compressing files on a laptop?
Built-in tools like Windows File Explorer and macOS Finder allow simple file compression without installing additional software. For more advanced options, programs like WinRAR, 7-Zip, or WinZip offer enhanced features such as password protection and multi-part archives. Choose a tool based on your specific needs and ease of use.
How can I ensure my compressed files stay secure?
To protect your compressed files, set strong passwords during the compression process. Use encryption options available in software like 7-Zip or WinRAR to secure the contents. Avoid sharing passwords insecurely and consider encrypting the files if they contain sensitive information.
What are the benefits of compressing large files on a laptop?
Compressing large files reduces their size, making them easier to store and faster to transfer over the internet or between devices. It helps save disk space and improves upload/download speeds, especially when handling numerous or sizable files.
Can I compress multiple files into a single archive easily?
Yes, most compression tools support adding multiple files into one archive. Simply select all the files you want to compress, right-click, and choose the option to add to a new archive. This process consolidates your files, simplifying sharing and organization.
Final Thoughts
In summary, knowing how to compress files on laptop helps save storage space and makes sharing easier. Select the files you want to compress, then right-click and choose the compress option or a similar command. Use familiar tools like built-in zip features or third-party software for more options. Practicing these steps ensures you can efficiently handle file compression whenever needed.