Quick Guide: Make Your Outdoor Bluetooth Speaker Sparkle in Minutes!
Hey there, tech adventurer! Ever bring your favorite outdoor Bluetooth speaker on a camping trip or a beach day, only to find it covered in dust, sand, or maybe even a sticky soda spill? It happens to the best of us! We love taking our music everywhere, but sometimes our gear takes a little beating. It can feel a bit daunting trying to get it clean without damaging those precious sound-makers, right? Don’t worry, I’ve got your back! We’re going to break down how to get your outdoor speaker looking and sounding its best, super fast and super easy.
Think about it – that speaker is your trusty sidekick for backyard BBQs, park picnics, and even just chilling on the patio. When it gets a little grimy, the sound might not be as crisp, and let’s be honest, it just doesn’t look as cool. But before you think about tossing it or spending a fortune on a new one, let’s see if a quick clean-up can work wonders. It’s like giving your speaker a mini spa day, and it’ll thank you with better tunes.
We’ll go through everything step-by-step, using simple tricks that don’t require any fancy gadgets. You’ll be surprised how quickly you can transform your dusty speaker back into a pristine audio powerhouse. Ready to dive in and give your speaker the TLC it deserves? Let’s get those outdoor jams sounding fantastic again!
Why Cleaning Your Outdoor Speaker Matters
Outdoor Bluetooth speakers are built tough, but they’re not indestructible. They’re designed to handle a bit of the elements – maybe a splash of rain or some dust. However, over time, dirt, grime, pollen, and even stubborn sticky stuff can build up. This isn’t just about looks; a dirty speaker might not sound as good. Dust can actually muffle the sound coming from the drivers, making your music sound a bit dull.
Think about where you usually take your speaker: dusty trails, sandy beaches, or maybe a backyard with pollen everywhere. These environments are speaker playgrounds, but they can leave behind a mess. A speaker that’s constantly exposed to the outdoors needs regular attention to keep it working at its best. Plus, a clean speaker just feels better to use, doesn’t it?
The Best Way to Clean Your Outdoor Bluetooth Speaker: A Quick Fix
Let’s get down to business! Cleaning your outdoor Bluetooth speaker doesn’t need to be a huge chore. We’re aiming for a “fast fix” here, so you can get back to enjoying your tunes without a lot of fuss. The key is to be gentle and use the right tools. We want to clean, not to damage!
Step 1: Safety First – Power Down and Disconnect!
Before you even think about grabbing a cloth, make sure your speaker is completely powered off. If it’s rechargeable, unplug it from any charging cables. This is super important for safety. You don’t want any accidental shocks or short circuits while you’re cleaning. It’s a simple step, but it’s the most crucial one to start with.
Step 2: Gather Your Cleaning Arsenal
You probably have most of these items at home already! You won’t need anything complicated. Here’s what to have ready:
Microfiber cloths: These are great because they don’t scratch surfaces and are good at picking up dust and grime. Have a couple handy – one for dusting and one for wiping.
Soft-bristled brush: An old toothbrush or a soft paintbrush works perfectly for getting into nooks and crannies.
Cotton swabs (Q-tips): Ideal for cleaning around speaker grilles and buttons.
Distilled water: Tap water can sometimes leave mineral deposits. Distilled water is pure and safer for electronics.
Mild soap (optional): If you have a really stubborn spot, a tiny bit of mild dish soap mixed with distilled water can help. Think like, one drop of soap in a cup of water.
Compressed air (optional but helpful): Great for blowing dust out of ports and speaker grilles.
Step 3: Dust and Debris Removal
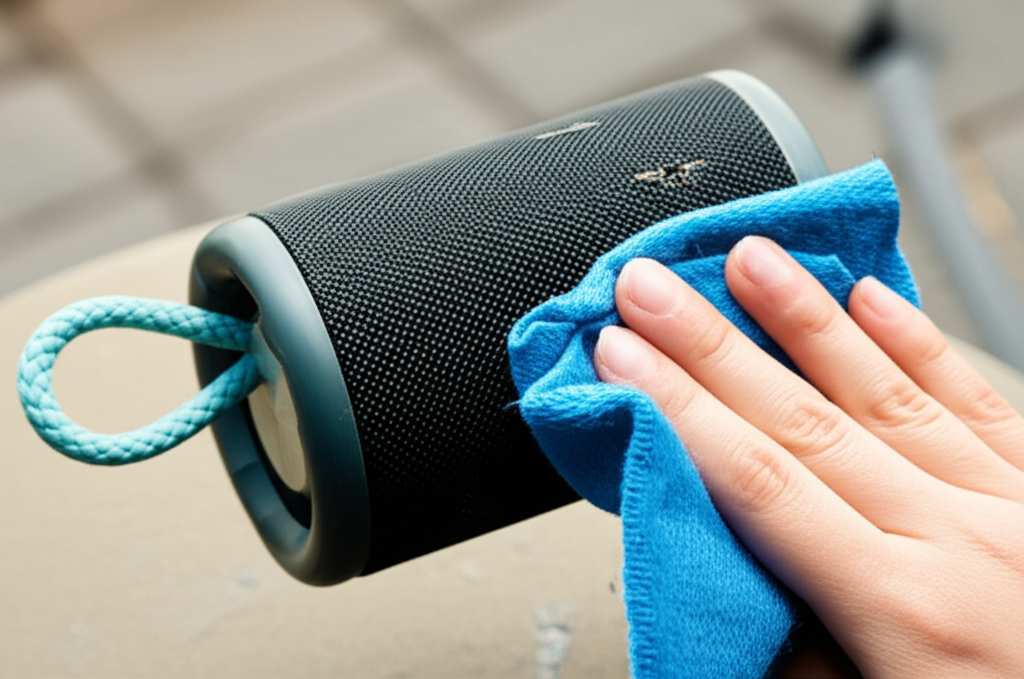
Start with the basics. Grab a dry microfiber cloth and gently wipe down the entire exterior of the speaker. Get into all the grooves and edges. For stubborn dust bunnies or debris caught in tight spots, use your soft-bristled brush. A gentle brush can dislodge dust without scratching the speaker’s casing.
If you have compressed air, now’s a great time to use it. Hold the can upright and give short bursts to blow dust away from ports, buttons, and speaker grilles. Be careful not to spray too close or too long, as the propellant can be cold. Just a quick puff is usually enough to clear out the loose stuff.
Step 4: Tackling Grime and Stains
For fingerprints, smudges, or light dirt, slightly dampen a clean microfiber cloth with distilled water. Wring out the cloth thoroughly so it’s just damp, not wet. Gently wipe down the surfaces. You don’t want any moisture to seep into the speaker’s openings.
If you encounter sticky spots or tougher grime, you can use that mild soap solution. Dip a cotton swab into the diluted soap and water, squeeze out any excess liquid, and carefully clean the affected area. Follow up immediately with a separate cotton swab dampened with just distilled water to rinse away any soap residue. Then, use a dry microfiber cloth to pat it dry.
Step 5: Cleaning Speaker Grilles and Ports
The speaker grilles are where dust and dirt love to hide. Use your soft-bristled brush or a dry cotton swab to gently dislodge any particles. For really stubborn gunk, a slightly damp cotton swab can be used, but be extremely careful not to push debris further in or get the grille wet if it’s not designed for it.
For charging ports, auxiliary jacks, or any other openings, a dry cotton swab or a puff of compressed air is your best bet. Gently clean around the edges of the ports. Never insert anything sharp or metallic into these ports, as you could damage the delicate connectors inside.
Step 6: Drying and Reassembly
After cleaning, let your speaker air dry completely before powering it back on or reconnecting any cables. You can gently pat down any damp areas with a dry microfiber cloth. Ensure all ports and openings are completely dry. Patience is key here – don’t rush the drying process! Once you’re sure it’s dry, you can power it back up and reconnect it.
Tips for Different Types of Outdoor Speakers
Most outdoor speakers follow similar cleaning principles, but some have specific features to consider.
Water-Resistant vs. Waterproof Speakers
Many outdoor speakers are rated for water resistance (like IPX5 or IPX7). This means they can handle splashes or even brief submersion. If your speaker is water-resistant, you might be able to use a slightly more damp cloth, but always check your manual. For waterproof speakers, cleaning is usually more straightforward, but it’s still best to avoid soaking them unless the manufacturer explicitly says it’s okay.
Fabric Grilles
Some speakers have fabric grilles. For these, gentle brushing and spot cleaning with a very lightly damp cloth are best. Avoid harsh chemicals or excessive moisture, as this can damage the fabric.
Silicone or Rubber Casings
If your speaker has a rugged silicone or rubber casing, it might attract dust and lint. A microfiber cloth usually does a great job here. For stubborn marks, a damp cloth with a tiny bit of mild soap can work, but always dry it thoroughly.
What NOT to Do When Cleaning Your Speaker
It’s just as important to know what not to do. Making a mistake here could mean a damaged speaker.
Don’t spray liquids directly onto the speaker: Always apply cleaning solutions to your cloth or swab first.
Don’t use harsh chemicals: Avoid alcohol, ammonia, bleach, or abrasive cleaners. These can damage the speaker’s finish and materials.
Don’t submerge your speaker unless it’s rated for it: Even then, follow the manufacturer’s instructions carefully.
Don’t use paper towels: They can leave lint behind and scratch surfaces. Stick to microfiber cloths.
Don’t use excessive force: Be gentle when brushing or wiping.
Fast Fix for Specific Outdoor Mishaps
Life happens, and sometimes your speaker encounters more than just dust. Here are quick fixes for common outdoor speaker problems:
The Sand Attack
If your speaker gets covered in sand after a beach day, don’t panic! First, try to brush off as much dry sand as possible with a soft brush. Then, use a dry microfiber cloth to gently wipe the surfaces. For any stubborn sand grains, a very lightly damp cloth with distilled water can help. Make sure to dry it thoroughly afterward, especially around ports. Compressed air can also be helpful for sand lodged in grilles.
The Sticky Spill (Soda, Juice, etc.)
Sticky spills are the worst! For a fresh spill, act fast. Blot up as much of the liquid as possible with a clean, dry cloth. Then, use a cotton swab dipped in a mild soap and distilled water solution to gently clean the sticky area. Immediately follow with a clean, damp swab (distilled water only) to rinse, and then dry thoroughly with a microfiber cloth. If the spill got into ports, use a dry cotton swab or compressed air carefully.
Muddy Mayhem
If your speaker takes a tumble in the mud, let the mud dry first. Once dry, you can gently brush off the larger chunks with a soft brush. Then, use a slightly damp microfiber cloth to wipe away the remaining residue. Again, follow up with a dry cloth and ensure all openings are dry before powering on.
Maintenance Tips for Longevity
To keep your outdoor speaker in top shape and avoid needing deep cleans too often, follow these simple tips:
Wipe down after each use: A quick wipe with a microfiber cloth after a dusty or dirty outing can prevent buildup.
Store it properly: When not in use, store your speaker in a cool, dry place. A protective case or its original box can help.
Keep away from extreme temperatures: While outdoor speakers are built for durability, prolonged exposure to extreme heat or cold can affect the battery and electronics.
Check for updates: Some speakers have firmware updates that can improve performance and sometimes even water resistance.
A Quick Look at Popular Outdoor Speaker Features
When choosing or caring for an outdoor speaker, certain features are key. Here’s a quick rundown of what matters for outdoor use:
| Feature | What it Means | Why it’s Great for Outdoors |
| :—————— | :—————————————————————————— | :———————————————————————————————————————– |
| IP Rating | Ingress Protection rating. Shows how well it’s protected against dust and water. | Higher numbers (e.g., IPX7) mean better protection against rain, splashes, and even submersion. Essential for outdoor use! |
| Portability | Size, weight, and carrying handle/strap. | Easy to pack, carry to the beach, or hang from a backpack. |
| Battery Life | How long it plays on a single charge. | Longer battery life means more music without needing to find a power outlet. Perfect for long days out. |
| Durability | Rugged casing, shock resistance. | Can withstand accidental drops or bumps, common when traveling or being used outdoors. |
| Connectivity | Bluetooth version, multi-point pairing. | Latest Bluetooth versions offer better range and stability. Multi-point lets you connect two devices at once. |
| Sound Quality | Bass response, clarity, volume. | Good sound makes any outdoor gathering better, from music to podcasts. |
Understanding these features helps you appreciate why some speakers are better suited for outdoor adventures. For instance, a speaker with an IP67 rating is fantastic because it’s protected from dust and can be submerged in water up to 1 meter for 30 minutes. That’s peace of mind for beach or poolside use!
How to Clean Outdoor Bluetooth Speaker: Step-by-Step Checklist
Here’s a handy checklist to make cleaning your speaker a breeze:
[ ] Power off the speaker and unplug any chargers.
[ ] Gather microfiber cloths, soft brush, cotton swabs, distilled water, and optional mild soap/compressed air.
[ ] Gently brush off loose dust and debris from the entire speaker.
[ ] Use compressed air for ports and speaker grilles.
[ ] For smudges, use a slightly damp microfiber cloth with distilled water.
[ ] For tough spots, use a cotton swab with a tiny bit of mild soap solution, then rinse with water-dampened swab.
[ ] Carefully clean speaker grilles and ports with a dry brush or swab.
[ ] Dry the speaker thoroughly with a clean microfiber cloth.
[ ] Allow the speaker to air dry completely before powering on.
This checklist is your go-to guide for a quick and effective clean. It ensures you don’t miss any steps and keeps your speaker in great condition.
Frequently Asked Questions About Cleaning Outdoor Speakers
Got more questions? I’ve got answers!
Q1: Can I use regular tap water to clean my speaker?
It’s best to use distilled water if possible. Tap water can sometimes contain minerals that might leave spots or residue on your speaker, especially if you use a lot of it. Distilled water is pure and safer for your electronics.
Q2: My speaker got wet. What should I do?
If your speaker is water-resistant or waterproof, this is usually okay! Just follow the cleaning steps above to wipe it down. If it’s not designed to get wet, turn it off immediately, unplug it, and let it air dry completely for at least 24-48 hours. Avoid using heat to dry it.
Q3: How often should I clean my outdoor speaker?
It really depends on how often and where you use it. A quick wipe-down after a dusty or sandy trip is a good idea. For a more thorough clean, aim for every few months, or whenever you notice dirt or grime affecting its appearance or sound.
Q4: Can I use Windex or other household cleaners?
No, please don’t! Harsh chemicals like Windex, alcohol, or ammonia can damage the speaker’s finish, seals, and internal components. Stick to mild soap and water or just distilled water for the best results.
Q5: What if the speaker grille is clogged with debris?
A soft-bristled brush is your best friend here. Gently brush the debris away. If it’s really stuck, you can try a dry cotton swab. For stubborn bits, a very lightly damp swab can help, but be careful not to push anything further in or soak the grille.
Q6: My speaker smells a bit musty. How can I fix that?
A musty smell usually comes from moisture and lack of ventilation. Ensure the speaker is completely dry. You can try leaving it in a dry, well-ventilated area for a day. If the smell persists, a very lightly scented (but non-chemical) air freshener spray away from the speaker, or placing it near an open box of baking soda in a confined space (like a closet, not while playing) for a day might help absorb odors. Always ensure it’s bone dry before using.
Q7: Is it okay to clean the charging port with a damp cloth?
It’s better to avoid using damp cloths on charging ports. Moisture can cause corrosion or short circuits. Use a dry cotton swab or a blast of compressed air to clean out any dust or debris from the port.
Bringing the Sound Back to Life
See? Cleaning your outdoor Bluetooth speaker is totally doable and doesn’t require a tech degree or a trip to the store for special supplies. With just a few common household items and a little bit of gentle care, you can bring your speaker back to its former glory. Remember, a little bit of regular maintenance goes a long way in keeping your tunes sounding great and your gear looking sharp.
So, next time your speaker picks up a bit of dust or sand from your adventures, you know exactly what to do. It’s a simple process that makes a big difference. You’ve got the knowledge now to tackle any cleaning challenge.
Now go enjoy that crystal-clear sound, whether you’re at the beach, on a hike, or just chilling in your backyard. Make every moment louder and better with a speaker that’s as clean as it is powerful! Happy listening!