Unlock the best possible audio experience by understanding how to adjust your equalizer. This guide breaks down equalizer settings, explaining frequency bands and common adjustments to tailor sound to your preferences and room acoustics. Learn to make subtle tweaks for dramatic improvements in bass, mids, and treble.
Are you tired of music sounding a bit “off”? Maybe the bass is muddy, the vocals are hard to hear, or the highs are too harsh. If so, you’re probably nodding along and thinking, “Yes, that’s exactly it!” The good news is, you don’t need to be a sound engineer to fix it. Your equalizer, or EQ, is a powerful tool that can transform your listening experience. Learning how to adjust equalizer for best sound is like having a secret weapon for your ears.
Think of your equalizer as a set of fine-tuning knobs for your audio. It allows you to boost or cut specific frequencies – the pitches that make up sound. From the deepest rumble of a kick drum to the sparkling shimmer of a cymbal, each part of the sound spectrum can be shaped. This guide will walk you through understanding your EQ and making adjustments that will make your music, podcasts, or even movie dialogue sound absolutely fantastic.
## Understanding the Frequency Spectrum: What Do Those Sliders Actually Do?
Before you start pushing buttons, it’s helpful to know what you’re actually manipulating. An equalizer divides sound into different frequency bands, usually represented by sliders on a graphic equalizer or parameters on a parametric EQ. Each band corresponds to a range of pitches. Let’s break down the main ones you’ll encounter.
The Low Frequencies (Bass): Feeling the Rumble
This is the foundation of your sound. We’re talking about everything from the deep thud of a bass drum to the resonant notes of a bass guitar, and even the low growl of a male voice. These frequencies typically range from about 20 Hz to 200 Hz.
- Sub-Bass (20 Hz – 60 Hz): This is the really deep stuff you feel more than hear. It adds impact and weight to music, especially electronic or cinematic scores. Too much here can make the sound muddy and overwhelming.
- Bass (60 Hz – 200 Hz): This is where the main warmth and body of the bass instruments reside. It gives music its punch and drive. Overdoing this can make your speakers sound boomy and unclear.
When you adjust these sliders, listen to how it affects the kick drum or bass line. Do you want more impact? A gentle boost might help. Does it sound like a muffled foghorn? A slight cut is probably in order.
The Mid Frequencies (Mids): Where the Magic Happens
This is arguably the most important part of the frequency spectrum for most audio. It’s where vocals, guitars, pianos, and most instruments shine. These frequencies generally fall between 200 Hz and 4,000 Hz (or 4 kHz).
- Low-Mids (200 Hz – 500 Hz): This range gives instruments and vocals their fullness and body. However, it’s also where boxy or muddy sounds can creep in, especially in speech.
- Mids (500 Hz – 2 kHz): This area is crucial for clarity. It’s where the fundamental tones of most instruments and the main character of vocals are found. Too much here can sound honky or nasal.
- High-Mids (2 kHz – 4 kHz): This range adds presence and clarity to vocals and instruments. It helps them cut through the mix. However, too much can make things sound harsh or fatiguing.
For example, if a singer’s voice sounds distant or muffled, try a small boost in the 2 kHz to 4 kHz range. If guitars sound too “honky,” a cut in the 500 Hz to 1 kHz area might help.
The High Frequencies (Treble): Adding Sparkle and Detail
This is the realm of cymbals, sibilance (those “s” and “sh” sounds in vocals), and the airy sparkle of certain instruments. These frequencies range from about 4 kHz upwards.
- Presence (4 kHz – 6 kHz): This range contributes to the intelligibility of speech and the crispness of instruments. It’s where you hear detail and definition.
- Brilliance (6 kHz – 12 kHz): This is where you get the shimmer and air. Think of the sparkle of a hi-hat cymbal or the clarity of a flute.
- Air (12 kHz – 20 kHz): This highest range adds a sense of space and openness. It’s subtle but contributes to a natural sound.
If your music sounds dull, a gentle boost in the 6 kHz to 12 kHz range can add some life. Be careful, though, as too much boost can lead to a piercing, sibilant, or brittle sound.
Key Takeaways
- Understanding Frequency Bands: Knowing what the different sliders on your equalizer control – from deep bass to crisp treble – is the first step to effective adjustment.
- Start with Flat: Always begin with your equalizer set to a “flat” response (all sliders at 0 dB) to establish a baseline before making changes.
- Listen Critically: Use familiar music tracks and listen for specific elements like vocals, bass lines, and cymbal crashes to judge the impact of your adjustments.
- Room Acoustics Matter: The shape and furnishings of your room significantly affect sound, so adjustments are often needed to compensate for echoes and resonances.
- Subtlety is Key: Small, incremental adjustments usually yield better results than drastic boosts or cuts, preventing distortion and an unnatural sound.
- Genre-Specific Tweaks: Different music genres benefit from slightly different EQ settings; consider tailoring your adjustments to the type of music you listen to most.
📑 Table of Contents
The Golden Rule: Start Flat and Listen
The most important principle when learning how to adjust equalizer for best sound is to start with a clean slate. Your equalizer should ideally be set to a “flat” response. This means all the sliders are at 0 dB, or the EQ is completely bypassed. This gives you a neutral starting point to hear the natural sound of your audio system.
Why “Flat” is Your Friend
Many audio devices come with preset EQ curves like “Rock,” “Pop,” or “Jazz.” While these can be a starting point, they are generic and don’t account for your specific listening environment or personal preferences. Starting flat allows you to truly hear what your speakers are capable of and what the music is actually meant to sound like. You can then make deliberate changes based on what you hear.
Using Familiar Tracks as Your Guide
When making adjustments, it’s crucial to use music you know intimately. Play tracks that you’ve listened to countless times. Focus on specific elements:
- Vocals: Are they clear and forward, or buried in the mix?
- Bass Guitar/Kick Drum: Is it tight and punchy, or muddy and boomy?
- Cymbals/High Hats: Are they crisp and present, or harsh and sibilant?
- Acoustic Instruments: Do they sound natural and full?
As you make changes, listen carefully. Does the adjustment improve the element you’re focusing on, or does it negatively impact something else? This critical listening is the core of learning how to adjust equalizer for best sound.
Adjusting for Your Room: The Unseen Influence
Your listening space has a massive impact on how sound reaches your ears. Hard surfaces like walls and windows reflect sound, creating echoes and standing waves that can muddy the bass or create uneven frequency responses. Soft surfaces like carpets and curtains absorb sound, which can make a room sound dead.
Understanding Room Modes
At lower frequencies, especially in smaller rooms, sound waves can create “room modes” – areas where certain bass frequencies are amplified or cancelled out. This is why your bass might sound boomy in one spot and almost non-existent in another. You might need to slightly cut specific problem frequencies if you can identify them.
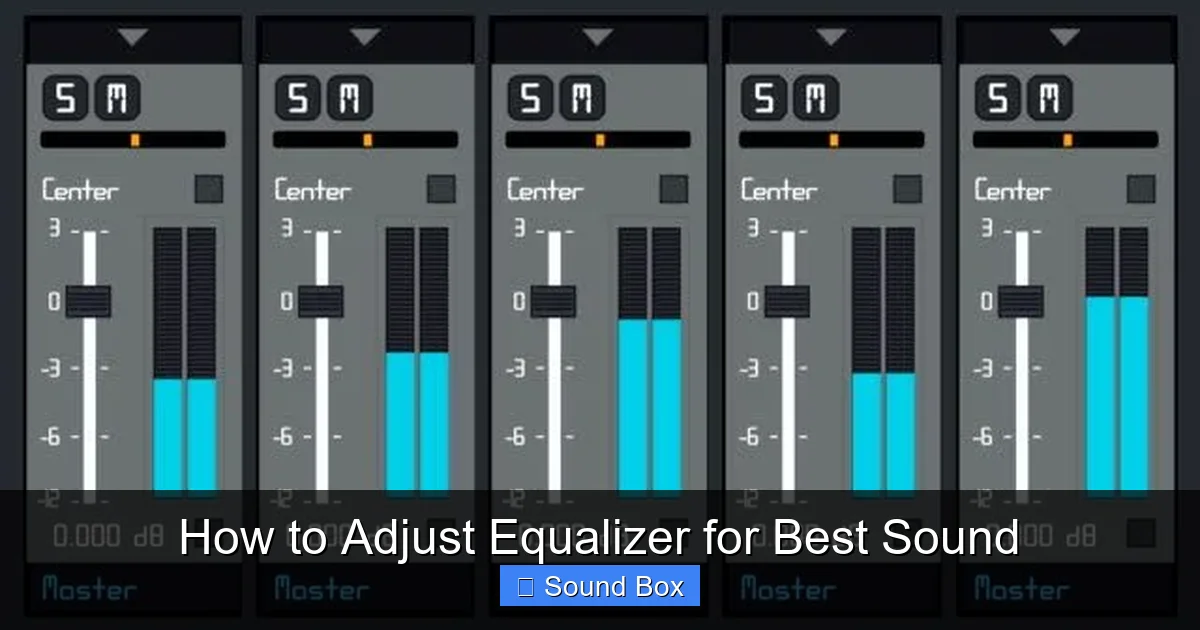
Visual guide about How to Adjust Equalizer for Best Sound
Image source: i.pinimg.com
Dealing with Reflections
Mid and high frequencies are more directional and prone to reflections. If your room has a lot of hard surfaces, you might find that your audio sounds “bright” or “harsh” because the high frequencies are bouncing around. Conversely, a very “dead” room might make your music sound dull.
While you can’t change your room’s physical properties with an equalizer, you can often compensate. If your room is too reflective (bright), you might need to slightly reduce the higher frequencies. If it’s too absorbent (dull), a gentle boost in the higher frequencies might help bring back some clarity. For more advanced room acoustic solutions, consider how you might use things like acoustic panels or strategically placed furniture. Proper speaker placement is also vital; understanding how to position speakers can make a huge difference before you even touch the EQ.
Common Equalizer Adjustments and When to Use Them
Let’s look at some typical scenarios and how you might approach them when trying to adjust equalizer for best sound.
Boosting the Bass
When: You want more punch and impact from electronic music, hip-hop, or movies. You might also want to add warmth to an acoustic track.
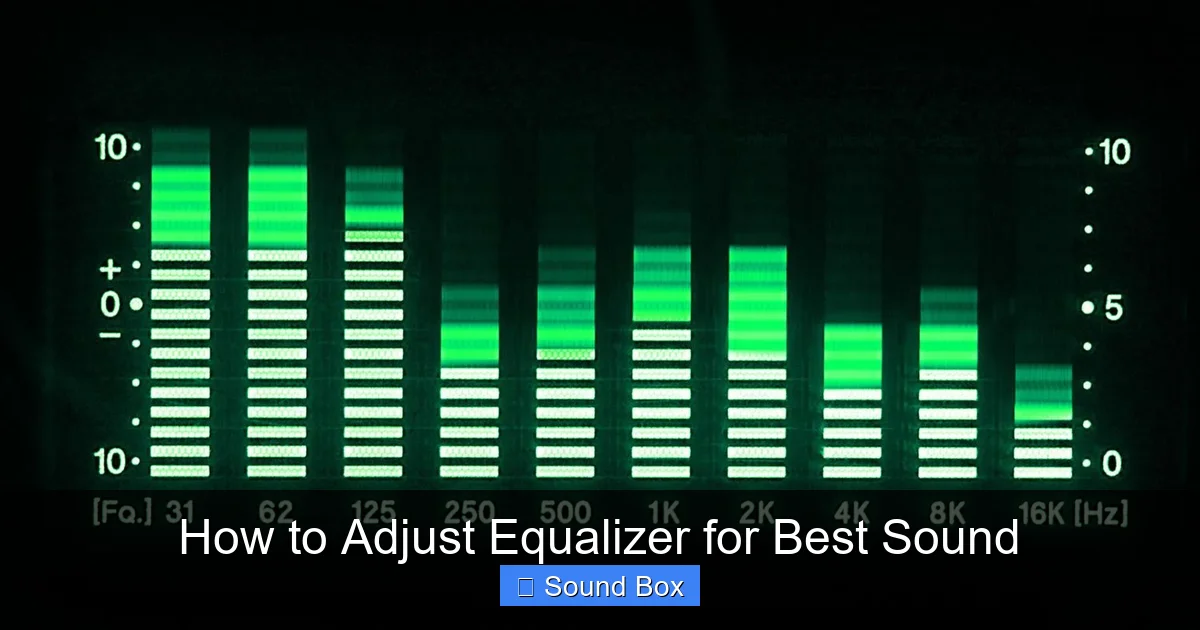
Visual guide about How to Adjust Equalizer for Best Sound
Image source: lifewire.com
How: Gently increase the sliders in the 60 Hz to 200 Hz range. Be cautious not to overdo it, as too much can lead to muddy, boomy, or distorted sound, especially if your speakers can’t handle it. Listen for tightness rather than just loudness. If you’re trying to get more bass from your portable speakers, ensure you’ve read up on which Bluetooth speaker has best bass.
Taming Muddy Mids
When: Vocals sound unclear, instruments blend together indistinctly, or the sound feels “boxy.”
How: Try making small cuts in the low-mid frequencies, typically between 200 Hz and 500 Hz. This can help clean up the sound and make individual instruments and vocals more distinct. Be careful not to cut too much, or your audio might sound thin.
Enhancing Vocal Clarity
When: You want vocals to be more forward and intelligible in a mix, or speech in podcasts and movies to be easier to understand.
How: A gentle boost in the mid-high frequencies, often between 2 kHz and 5 kHz, can make vocals pop. If the “s” and “sh” sounds (sibilance) become too harsh, you might need to slightly reduce frequencies around 6 kHz to 8 kHz.
Adding Sparkle and Detail (Treble)
When: Your music sounds dull, lacks excitement, or the high frequencies of instruments like cymbals or strings are missing.
How: A slight boost in the 6 kHz to 12 kHz range can add air and brilliance. Be very careful here. Too much boost can quickly lead to harsh, fatiguing, or piercing sound. You’re aiming for subtle shimmer, not a sonic attack.
Cutting Harshness
When: Certain sounds are painfully sharp, or the overall sound is fatiguing to listen to.
How: Identify the specific frequency range causing the harshness. Often, this is in the high-mid to upper treble range (e.g., 3 kHz to 8 kHz). Make a narrow, small cut to precisely target the offending frequency.
Tips for Effective EQ Adjustment
Mastering how to adjust equalizer for best sound is an ongoing process. Here are some practical tips to keep in mind:
- Make Small Changes: Resist the urge to make drastic boosts or cuts. Small adjustments (1-3 dB at a time) are usually more effective and less likely to introduce unwanted side effects.
- Boost to Cut, Sometimes: This sounds counterintuitive, but if you’re struggling to pinpoint a harsh frequency, you can sometimes temporarily boost a narrow band around it to make it more obvious. Then, cut that frequency.
- Use Your Ears, Not Your Eyes: While the visual representation of the EQ is helpful, your ears are the ultimate judge. Trust what you hear. If it sounds good, it is good.
- Consider the Source Material: Different recordings will have different sonic characteristics. What sounds great for one album might not for another.
- Think About the Environment: If you’re setting up speakers for an event, remember that room acoustics and crowd noise will affect what you need. For instance, improving sound quality for an outdoor party involves different considerations than a controlled indoor space.
- Don’t EQ Everything: Sometimes, the best EQ adjustment is no adjustment at all. If the sound is already balanced, leave it be.
- Save Your Settings: If your device allows, save your favorite EQ settings for different genres or listening situations.
Remember, the goal isn’t to make everything sound radically different, but to subtly enhance the natural qualities of your audio and correct any imbalances. It’s about refinement.
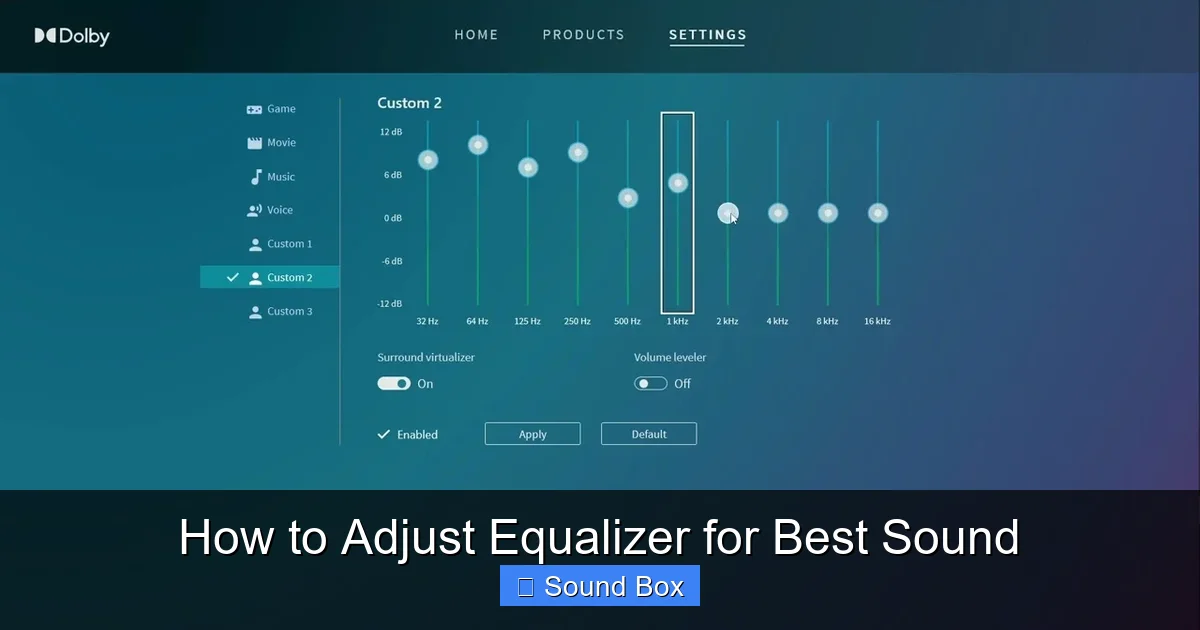
Visual guide about How to Adjust Equalizer for Best Sound
Image source: i.ytimg.com
When EQ Isn’t Enough
While an equalizer is a powerful tool, it’s not a magic wand. If your audio still sounds poor after careful EQ adjustments, other factors might be at play:
- Speaker Quality: Even the best EQ can’t make cheap or poorly designed speakers sound amazing. If you’re using basic speakers, it might be time to consider an upgrade. If you’re looking for new speakers, check out guides on how to choose the best Bluetooth speaker or how to choose the best speakers for a record player setup.
- Source Quality: Low-quality audio files (e.g., heavily compressed MP3s) will sound poor no matter how you EQ them.
- Room Acoustics: As mentioned, severe acoustic problems might require more than just EQ.
- System Limitations: Your amplifier or other components might be limiting your sound quality.
- Connection Issues: Ensure your cables are in good condition and properly connected. For wireless setups, consider the advice on how to set up Bluetooth speakers for best sound.
If you’ve exhausted your EQ options, look into these other areas. Sometimes, the best solution for a specific listening scenario is finding the right equipment or ensuring your setup is optimized from the start.
Conclusion: Your Sonic Tailor
Learning how to adjust equalizer for best sound empowers you to take control of your audio. It’s a journey of discovery, where you train your ears to hear the nuances of sound and learn how to shape them to your liking. Start with a flat EQ, listen critically to familiar music, make small, deliberate adjustments, and always consider your listening environment.
The goal isn’t to make your music sound artificial, but to reveal its true potential, enhance its clarity, and bring out the details that make it enjoyable. With a little practice and patience, you’ll be able to tailor your audio precisely to your preferences, transforming ordinary listening into an extraordinary experience. So go ahead, experiment, and enjoy the amazing sound you can create!
Frequently Asked Questions
What is the best starting point for adjusting an equalizer?
The best starting point is always a “flat” EQ setting, where all sliders are at 0 dB. This provides a neutral baseline from which you can make informed adjustments based on what you actually hear.
How much should I boost or cut frequencies?
Make small, incremental adjustments, typically no more than 1-3 dB at a time. Drastic changes can easily lead to distortion and an unnatural sound profile.
Can an equalizer fix bad speakers?
An equalizer can help optimize the sound from your speakers, but it cannot fundamentally change their quality. Poorly designed speakers will still sound limited, even with EQ adjustments.
How do I know which frequency to adjust?
Listen carefully to the specific sound you want to change. For example, if bass is muddy, focus on the low-mid frequencies. If vocals are unclear, target the mid-high frequencies. Using familiar music is key to identifying these areas.
Should I use EQ presets?
While presets can offer a starting point, they are generic. For the best sound, it’s recommended to adjust your EQ manually based on your specific audio source, equipment, and listening environment.
How does my room affect equalizer settings?
Your room’s acoustics significantly impact sound. Hard surfaces can cause reflections and boomy bass, while soft surfaces can absorb too much sound. You often need to adjust EQ to compensate for these environmental factors.


