To make a power bank at home easily, start by gathering basic components like a lithium-ion battery, a charging circuit, a USB port, and wires. Connect everything carefully, ensuring proper insulation and safety precautions, and you’ll have a working portable charger in no time.
Building your own power bank at home might sound complicated, but with simple tools and some instructions, it’s quite manageable. This DIY project allows you to customize your portable charger according to your needs, saving money and giving you a sense of achievement. In this guide, I’ll walk you through the straightforward steps to create a safe, efficient power bank using everyday components. Whether you’re a beginner or looking to experiment, this process is easy to follow and very rewarding.

How to Make Power Bank at Home Easy: A Simple Guide
Understanding the Basics of a Power Bank
A power bank is a portable device that stores electrical energy to charge other devices like smartphones and tablets. It contains a battery, usually lithium-ion or lithium-polymer, inside a compact case. To make one at home, you need to understand how batteries work and the essential components involved.
Gathering the Necessary Components
Before starting, assemble all the parts you’ll need. Here is a list of basic components:
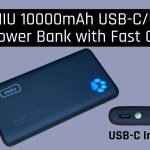
- Li-ion or lithium-polymer battery (preferably 2000mAh to 10000mAh capacity)
- Battery protection circuit module
- USB output port
- Charging circuit module (such as a TP4056 charger module)
- Switch to turn the power bank on and off
- Enclosure or case (can be a small box or DIY case)
- Wires and soldering tools
Choosing the Right Battery for Your Power Bank
Select a battery based on your power needs. A 2000mAh battery can charge your phone once or twice, while larger capacities like 5000mAh or 10000mAh last longer.
- Check the battery voltage, typically 3.7V for Li-ion batteries
- Ensure it has a built-in protection circuit or plan to add one
- Buy from reputable sources for safety and quality
Understanding the Circuit Components Needed
The main parts of the circuit are:
Battery Protection Circuit
This component is critical to prevent overcharging, over-discharging, and short circuits. It ensures safety during operation.
Charging Module (TP4056)
This module manages the safe charging of the lithium battery. It has an indicator LED to show charging status.
USB Output Module
Provides a standard USB port for connecting devices. It steps up the voltage to 5V suitable for most gadgets.
Switch
Allows you to easily turn the power bank on and off to conserve battery.
Step-by-Step Assembly Process
Follow these simple steps to assemble your power bank:
- Connect the battery to the protection circuit: Solder the battery’s positive and negative terminals to the protection circuit’s inputs.
- Wire the charging module: Connect the battery to the TP4056 charging module, ensuring correct polarity.
- Attach the USB output: Connect the USB module output to the protection circuit, which supplies power to the USB port.
- Install the switch: Link the switch between the battery’s positive terminal and the USB output to control power flow.
- Secure all components: Use tape or small casing to hold everything in place securely.
- Test the power bank: Charge the battery and connect a device to see if it charges properly.
Safety Tips During Assembly
Safety is crucial when working with batteries and electronic components:
- Always work in a dry, well-ventilated area
- Handle soldering iron carefully to avoid burns
- Double-check polarity connections to prevent short circuits
- Use insulated wires and avoid exposed wiring
- Test the power bank with low-power devices first
Designing Your Power Bank Case
Create a safe and ergonomic enclosure for your power bank:
- Use a small plastic box or repurpose a bulky container
- Ensure ventilation if the battery heats up during operation
- Place the switch and USB ports in accessible positions
- Secure all components tightly to prevent movement
Testing and Troubleshooting
Once assembled, test the power bank thoroughly:
- Ensure the switch functions properly
- Check if the device charges correctly through the USB port
- Verify protection circuits activate during overloads or short circuits
- Replace or re-solder loose or faulty connections as needed
Enhancing Your DIY Power Bank
Make your power bank more efficient and user-friendly:
- Add LED indicators to show battery level
- Use higher-capacity batteries for longer use
- Implement multiple USB ports for charging multiple devices
- Include a solar panel for eco-friendly recharging
Related Topics You Might Explore
To deepen your DIY skills, consider learning about:
Battery Management Systems (BMS)
These systems improve safety and battery lifespan.
Different Charging Circuits
Explore alternative modules for faster charging.
Eco-Friendly Power Banks
Use recycled batteries and sustainable materials.
Cost-Effective Power Bank Designs
Create affordable options using readily available parts.
Customizing Power Bank Cases
Design personalized enclosures with 3D printing or crafting.
Summary
Building a power bank at home is a practical project that requires basic electronic skills. By selecting the right parts, following safety practices, and assembling carefully, you can create a reliable device for everyday use. It’s a fun way to learn about batteries, circuits, and portable power solutions while saving money and gaining a sense of achievement.
A Simple Rechargeable Powerbank Anyone Can Make at home
Frequently Asked Questions
What basic materials do I need to assemble a simple homemade power bank?
To create a basic power bank at home, gather essential materials such as rechargeable batteries (like lithium-ion or lithium-polymer cells), a battery management system (BMS) to ensure safe charging and discharging, a USB charging module, wires, a casing to house the components, and basic tools like a soldering iron and screwdrivers. Make sure the batteries are compatible and have sufficient capacity for your needs.
How can I connect multiple batteries safely for higher capacity?
Connect the batteries in parallel to increase the overall capacity while maintaining the voltage. Use proper wiring techniques, ensuring each battery’s positive terminal connects to the others’ positive terminals, and the negatives connect similarly. Incorporate a reliable BMS to monitor voltage and prevent overcharging or discharging, which keeps the setup safe during use.
What steps should I follow to ensure the power bank is properly insulated and safe to use?
After assembling the components, insulate all exposed wiring and connections with electrical tape or heat shrink tubing to prevent short circuits. Secure the batteries and circuitry inside a sturdy casing to avoid movement and damage. Test the device thoroughly before regular use, checking for overheating or irregular behavior, and always handle the power bank with care to ensure safety.
Can I use any type of battery for making a power bank at home?
No, not all batteries are suitable for making power banks. Use rechargeable batteries like lithium-ion or lithium-polymer cells that are designed for repeated charging cycles and have known specifications. Avoid using batteries that are damaged, swollen, or not intended for such applications to ensure safe and reliable operation.
What precautions should I take while assembling a DIY power bank?
Always work in a well-ventilated area and wear protective gear such as gloves and safety glasses. Confirm the correct polarity of all components before soldering or connecting to prevent short circuits or damage. Double-check all connections and insulate exposed wires thoroughly. Follow safety guidelines for handling batteries and electronic components to prevent accidents.
Final Thoughts
Making a power bank at home easy involves selecting the right components like batteries, a charging circuit, and a case. Connect the batteries safely, install the circuit, and ensure proper insulation. Test your setup thoroughly before use.
In conclusion, how to make power bank at home easy is simple when you follow these straightforward steps and prioritize safety. This DIY approach saves money and provides a handy charging device.