To quickly test your WiFi router’s coverage, use a smartphone or laptop to walk around your home, noting where the signal drops or weakens, and utilize free apps or built-in tools to measure signal strength. These tests help identify dead zones and optimize your placement for better coverage.
In just a few simple steps, you can evaluate your WiFi coverage by walking through your space with a device capable of detecting WiFi signals. This allows you to pinpoint weak spots and improve your network’s reach efficiently. Ensuring comprehensive WiFi coverage means fewer interruptions and a smoother online experience for everyone in your home.
If your WiFi isn’t reaching all corners of your house or you notice slow internet speeds in certain areas, testing the coverage is the first step to fixing the issue. By systematically checking signal strength throughout your space, you can identify problem zones and adjust your router’s position or upgrade your equipment. This proactive approach not only boosts performance but also saves you the hassle of troubleshooting frustrating connectivity problems later.
How to Test WiFi Router Coverage
Testing your WiFi router coverage helps you understand where your signal is strong or weak. This process ensures your internet connection is reliable throughout your home or office. By following some simple steps, you can identify WiFi dead zones and improve your network performance.
Understanding WiFi Coverage and Signal Strength
WiFi coverage refers to the area where your wireless signal reaches effectively. The strength of your WiFi signal impacts your internet speed and connection stability. Stronger signals mean faster speeds and fewer disconnects.
Most routers broadcast signals using radio waves. These signals weaken as they travel farther from the router. Obstacles like walls, furniture, and appliances can block or weaken these signals.
Why Testing WiFi Coverage Is Important
Knowing your WiFi coverage helps you avoid dead zones where the internet is slow or unavailable. It allows you to reposition your router for better coverage.
Testing also helps you decide if you need additional equipment, like WiFi extenders or a mesh network. Proper testing ensures every part of your home has a reliable internet connection.
Tools Needed for Testing WiFi Coverage
Before testing, gather some helpful tools. These include:
- Smartphone or Laptop: Devices with WiFi capability for measurement.
- WiFi Analyzer App: Apps like NetSpot, WiFi Analyzer, or Fing can scan and measure WiFi signals.
- Speed Test Websites or Apps: Services like Ookla Speedtest or Fast.com help check internet speed.
Basic tools like a notebook or spreadsheet can also help you record results for comparison.
Steps to Test WiFi Router Coverage
Step 1: Map Out Your Space
Start by noting all areas where you need WiFi coverage. Mark walls, rooms, and obstacles that could impact the signal.
This map will guide your testing process and help you identify specific zones needing improvement.
Step 2: Measure Signal Strength at Different Locations
Use the WiFi analyzer app to scan your network. Record the signal strength in decibels (dBm) at various points. Look for signals above -60 dBm for good coverage.
Take measurements in different rooms, hallways, and outdoor spaces if needed.
Step 3: Test Internet Speed at Multiple Points
Use speed test apps or websites to measure your internet speed at each location. Compare these results to your plan or expected speeds.
Keep in mind that wireless speed can be affected by interference and distance.
Step 4: Identify Dead Zones and Weak Signals
Review your records to locate areas with weak signals or slow speeds. These are your dead zones or problem spots.
Note the proximity to the router and any obstacles present in these zones.
Factors That Affect WiFi Coverage and Signal Strength
Distance from the Router
The farther you are from your router, the weaker your signal becomes. Signal strength diminishes with distance, especially beyond 30 meters indoors.
Physical Obstacles and Interference
Walls, furniture, mirrors, and appliances can block or weaken WiFi signals. Metal objects and electronics like microwaves generate interference that disrupts signals.
WiFi Frequency Bands
Most routers operate on 2.4 GHz and 5 GHz bands. The 2.4 GHz band covers more area but offers slower speeds. The 5 GHz band provides faster speeds but has a shorter range.
Router Placement
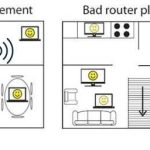
Placement significantly influences coverage. Central locations, elevated positions, and open spaces improve signal reach.
Improving WiFi Coverage Based on Testing Results
Reposition Your Router
Place your router in a central, open location. Avoid hiding it behind furniture or inside cabinets.
Elevate the router for better signal dispersal across the area.
Use WiFi Extenders or Mesh Networks
If you find dead zones, consider adding WiFi extenders or creating a mesh network. These devices expand coverage effectively.
Set up extenders in weak signal areas, ensuring they are within the main router’s range.
Change WiFi Channels
Interference from neighboring networks can affect your signal. Use your WiFi analyzer to find the least congested channel.
Switch to that channel in your router settings for better performance.
Upgrade Your Router
If your current router is outdated, consider upgrading to a newer model supporting higher speeds and better coverage.
Look for routers with multiple antennas and support for both 2.4 GHz and 5 GHz bands.
Additional Tips for Effective WiFi Testing
- Test at different times: WiFi performance can vary during peak usage hours.
- Repeat measurements: Conduct tests multiple times for consistency.
- Keep records: Document your findings to compare before and after adjustments.
- Involve others: Test in different parts of the house with family members or roommates.
Understanding Data from WiFi Testing
The key data points include signal strength measured in decibels (dBm), internet download and upload speeds, and latency (ping).
Ideal WiFi signals are above -60 dBm, with speeds matching your internet plan. Latencies below 50ms provide smoother browsing and streaming experiences.
Using this data, decide if your coverage is sufficient or if you need to make changes.
Common Challenges and How to Overcome Them
Interference from Other Networks
Neighboring WiFi networks can cause channel congestion. Use WiFi analyzer apps to find less crowded channels.
Multiple Floors and Large Spaces
Signal strength decreases with every floor. Employ mesh networks or multiple access points to cover all levels.
Obstructions and Furniture
Heavy furniture and metallic objects block signals. Re-arranging furniture or using better placement can help.
Final Thoughts on Testing WiFi Coverage
Regular testing ensures your WiFi network remains efficient and reliable. Simple measurements can reveal weak spots needing attention. With proper setup and adjustments, you can enjoy consistent, fast internet throughout your space.
How To Check Signal Strength On Wi-Fi Router
Frequently Asked Questions
What are effective methods to measure Wi-Fi signal strength across different areas of my home?
Use a Wi-Fi analyzer app on your smartphone or laptop to scan signal strength in various locations. Walk through your space while monitoring the signal readings to identify weak spots. This method helps you visualize how the signal varies and pinpoint areas needing improvement.
How can I identify dead zones where my Wi-Fi connection drops frequently?
Conduct a series of tests by moving around your home with a device connected to your Wi-Fi network. Pay close attention to areas where the connection becomes unstable or drops entirely. Mark those locations and consider adjusting your router placement or adding extenders to cover these zones.
What tools or devices can help me assess my Wi-Fi coverage more precisely?
Use dedicated Wi-Fi survey tools such as a Wi-Fi spectrum analyzer or a professional-grade signal meter. These devices provide detailed readings of signal strength, interference, and coverage areas, giving you a clearer picture of how your network performs throughout your space.
How can I optimize router placement based on testing results?
After testing, position your router in a central location away from obstructions and electronic interference. Elevate the router off the ground and avoid placing it near thick walls or metal objects. Re-test after repositioning to confirm improved coverage and signal quality.
Are there specific times or conditions I should consider testing my Wi-Fi coverage?
Test your Wi-Fi network during different times of the day, especially during peak usage periods. This helps identify how network congestion affects coverage and ensures your router can handle the demand throughout various usage patterns.
Final Thoughts
Testing wifi router coverage is simple and effective with a few key steps. Move around your space with a device, noting the signal strength at each point using your router’s app or speed test tools. Check for dead zones where the signal weakens or drops entirely.
Adjust your router’s position to improve coverage, placing it centrally and elevating it when possible. Re-test after each change to ensure optimal performance.
How to test wifi router coverage helps identify weak spots and optimize your setup. Regular testing guarantees strong, reliable Wi-Fi everywhere in your home or office.


