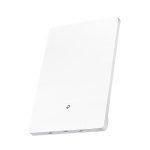
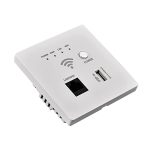
To mount your WiFi router on the wall quickly, start by selecting a sturdy spot away from obstructions, then use mounting brackets or screws to secure it. Make sure the location has good airflow and is close to your modem for optimal performance. Keep cables neat and accessible for easy maintenance.
Mounting a WiFi router on the wall is a simple way to improve your internet signal and keep your space organized. First, choose a central, open wall area away from thick furniture or appliances that could block the signal. Gather the necessary tools—screws, a drill, and possibly a mounting bracket—and follow the router’s instructions for wall installation. Ensuring proper placement not only enhances WiFi coverage but also keeps your router safe from accidental bumps or falls. With a little bit of prep work, you can enjoy a more reliable wireless connection and a tidy look in your home or office.
How to Mount WiFi Router on Wall: A Complete Guide
Why Mounting Your WiFi Router on the Wall Is Beneficial
Mounting your WiFi router on the wall can improve your internet experience significantly. It helps to distribute your WiFi signal more evenly across your home. Additionally, a wall-mounted router keeps it out of reach from children or pets, reducing the risk of accidental damage.
Choosing the Right Location for Wall Mounting
Selecting the best spot for your router is crucial for optimal coverage. Place your router in a central location within your home to maximize reach. Avoid areas near thick walls or metal objects that can block the WiFi signal.
Factors to Consider When Picking a Spot
- Height: Mount the router at a height of about 5 to 6 feet for better distribution.
- Obstructions: Keep it away from large metal furniture or appliances that emit interference.
- Distance from Walls: Place it away from exterior walls to enhance signal range.
- Proximity to Devices: Position near your primary devices for a faster connection.
Tools and Materials Needed
Before mounting, gather these essential items for a smooth setup process:
- Wall brackets or mounting plate compatible with your router
- Screwdriver and/or drill
- Screws and wall anchors suitable for your wall type
- Measuring tape or ruler
- Pencil for marking
- Level to ensure proper alignment
- Optional: adhesive pads or double-sided tape for lighter routers
Step-by-Step Process to Mount Your WiFi Router on the Wall
Step 1: Read the Router’s Manual
Start by reviewing your router’s manual to understand mounting options and compatible accessories. Some routers come with specific mounting brackets or instructions.
Step 2: Measure and Mark the Spot
Use a measuring tape to find the ideal location based on earlier considerations. Mark the mounting points on the wall with a pencil. Double-check measurements to ensure the router will be level.
Step 3: Prepare the Wall
Depending on your wall type—drywall, brick, or plaster—you’ll need appropriate anchors. Drill holes into the marked spots using a drill or screwdriver.
Step 4: Insert Wall Anchors and Attach Brackets
Press wall anchors into the drilled holes if you’re mounting on drywall. Secure the brackets or mounting plate to the wall with screws, ensuring they are firmly attached.
Step 5: Mount the Router
Align the router with the brackets or plate and carefully hang or secure it. Make sure it is stable and flush against the wall.
Additional Tips for a Stable and Safe Mounting
– Always use the appropriate screws and anchors for your wall type.
– Use a level to keep the router straight; an uneven placement can affect WiFi coverage.
– Avoid mounting near metal objects or appliances that can cause interference.
– Keep cords tidy to prevent tripping or accidental pulls.
Ensuring Good WiFi Signal After Mounting
Once mounted, test your WiFi coverage in different rooms. Adjust the position slightly if needed to improve signal strength. Consider updating your router’s firmware for better performance and security.
Maintenance and Safety Tips
– Regularly check that the router remains securely mounted over time.
– Keep the router clean and dust-free to prevent overheating.
– Avoid mounting in humid or very hot areas to avoid damage.
– Turn off and unplug the router before any maintenance or adjustments.
Related Topics
How to Improve WiFi Signal Strength
Learn simple tricks like repositioning your router, changing channels, or upgrading to a mesh network for better coverage.
Best Router Placement Tips for Faster Internet
Discover how to position your router for minimal interference and maximum speed across your home.
Creative Ways to Conceal Your Router
If aesthetics matter, explore stylish covers, inside furniture, or behind decorative panels to hide your device without compromising access.
Summary
Mounting your WiFi router on the wall ensures better coverage, cleaner space, and safer placement. Follow proper steps for choosing the right location, gathering tools, and securely fixing your device. Regularly test and adjust your setup to keep your WiFi running smoothly. Proper installation leads to strong, consistent internet access throughout your home, making your online experience more enjoyable.
Wall-Mounting Wiz: Securely Fixing Your Router with Precision!
Frequently Asked Questions
What are the best places to mount a Wi-Fi router on the wall for optimal signal coverage?
Mount your Wi-Fi router in a central location on the wall, preferably at a higher position to avoid obstructions. Avoid placing it near metal objects, thick walls, or electronic devices that can interfere with the signal. Installing it near the ceiling, preferably on a high shelf or directly on the wall at eye level, helps ensure a wide and even distribution of the Wi-Fi signal throughout your space.
How can I securely attach my Wi-Fi router to the wall without damaging it?
Use appropriate wall anchors and screws that can support the weight of your router. Select mounting brackets or adhesive strips designed for electronic devices if your router supports it. Before installation, check the router’s mounting holes, and ensure you drill into studs or use drywall anchors for added stability. Handle the router carefully to prevent damage and ensure it remains securely attached over time.
Are there specific tools or materials I should use when mounting my Wi-Fi router on the wall?
Gather a drill, suitable screws, wall anchors, a level, and a screwdriver. Use a pencil to mark where you will drill holes based on the mounting holes of your router. If mounting on drywall, choose appropriate anchors to provide extra support. A level ensures that the router is straight, which helps with aesthetics and stability. Having these tools and materials on hand makes the installation smoother and more secure.
Final Thoughts
To mount a wifi router on wall effectively, first choose a central location for optimal coverage. Use a level to ensure the mount is straight. Drill holes and secure the mounting bracket firmly.
Ensure the router’s vents remain unobstructed for proper airflow. When finished, connect your router and test the signal strength.
In conclusion, knowing how to mount wifi router on wall simplifies installation and improves connectivity. Follow these steps for a secure and efficient setup.


